
To film an effective craft demonstration, focus on understanding your audience’s needs and preferences, then plan shots that clearly showcase each step with consistent angles and close-up details. Use proper lighting and focus to highlight textures, add clear voiceovers and visual cues like arrows or text, and keep your edit engaging and concise. Ensuring good audio and visual clarity helps viewers follow along easily. Keep watching to learn each step for making your craft videos truly instructional.
Key Takeaways
- Use consistent framing and angles to clearly showcase each step of the craft process.
- Incorporate close-up shots and visual cues like arrows or text overlays for emphasis.
- Add clear voiceovers or descriptive audio to explain each step thoroughly.
- Ensure good lighting and sound quality to enhance visual clarity and viewer engagement.
- Edit for smooth transitions, highlight key steps, and keep the demonstration focused and concise.
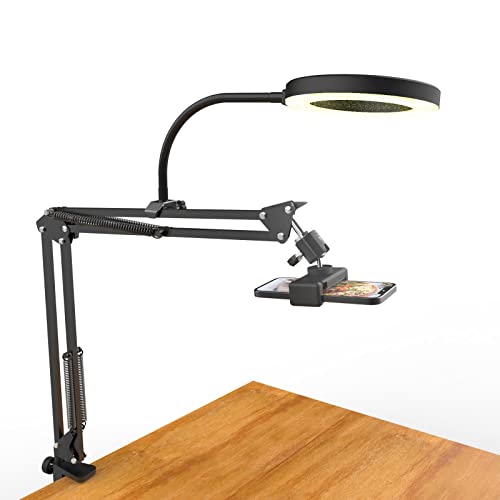
Overhead Camera Mount with Ring Light, Flexible Articulating Phone Arm Stand Compatible with iPhone, Logitech Webcam, Desk Tripod for YouTube Live Stream Cooking Nail Video Recording
- Dimmable Ring Light: 3 lighting modes with 10 brightness levels
- 360° Rotatable Light: Swivel ball head for adjustable angles
- USB Powered: Compatible with power bank, wall charger, laptop
As an affiliate, we earn on qualifying purchases.
As an affiliate, we earn on qualifying purchases.
Know Your Audience to Make Your Craft Demo Easy to Follow
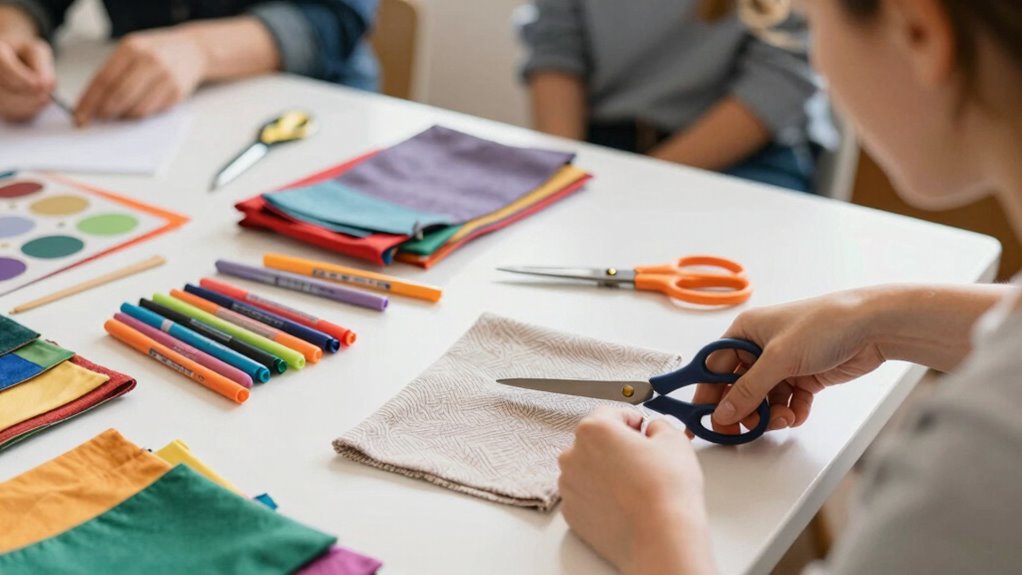
Understanding your audience is essential to creating a craft demonstration they can easily follow. To do this, you need to contemplate their needs and learning preferences. Are they beginners or experienced crafters? Do they prefer detailed step-by-step instructions, or do they learn better through visuals? Knowing this helps you tailor your presentation, making it more engaging and accessible. For example, if your audience favors visual learning, focus on clear, close-up shots of your hands and tools. If they prefer concise instructions, keep your explanations brief but informative. content formats can influence how effectively your message is conveyed and received. Additionally, considering your audience’s learning styles allows you to choose the most effective presentation methods, ensuring your demo resonates with viewers. Incorporating appropriate visual aids can further enhance understanding and retention of the demonstration. Recognizing the importance of auditory processing can also help you adjust your cues and explanations to better suit your viewers’ needs. Being aware of attention span is also crucial for keeping your audience engaged throughout the demonstration.
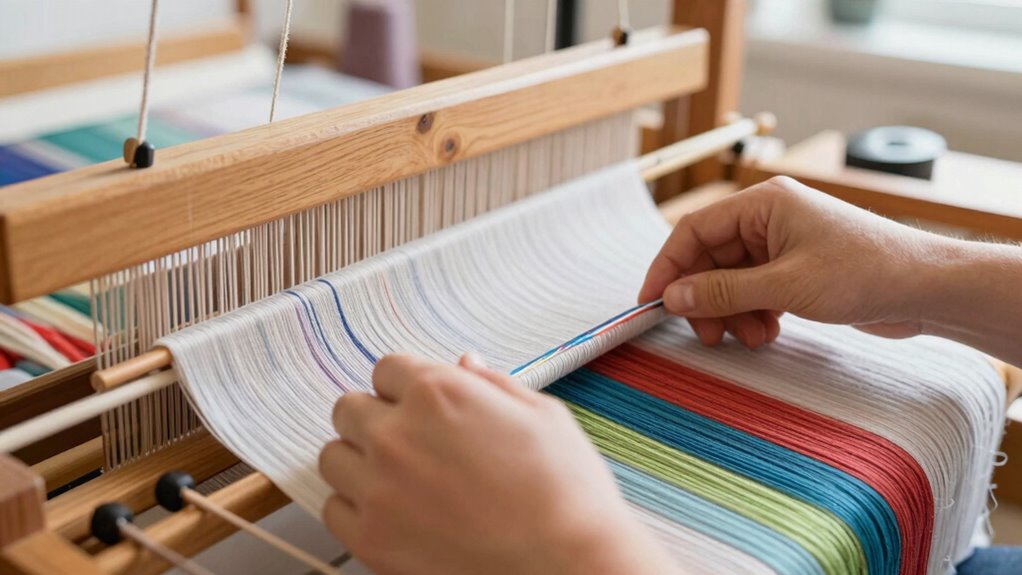
Plan Your Shots and Camera Angles for Your Craft Tutorial

To create a clear and engaging craft tutorial, you need to identify your key angles that showcase each step effectively. Make sure to use consistent framing so your audience can follow along without confusion. Planning these shots ahead of time helps your video stay smooth and professional from start to finish. Incorporating visual storytelling techniques can further enhance viewer understanding and retention. Additionally, considering video production best practices can improve the overall quality and clarity of your tutorial. Paying attention to lighting and sound ensures your viewers can see and hear every detail clearly, making your tutorial more effective. Recognizing the importance of shot composition can help you frame each scene for maximum clarity and visual appeal, and using camera angles strategically can highlight important techniques more effectively.
Identify Key Angles
Planning your shots and camera angles is essential to create a clear and engaging craft tutorial. To do this, identify the key angles that best showcase each step of your process. Focus on shot composition to highlight important details, such as close-ups of intricate work or wide shots to show your workspace. Consider camera movement that smoothly shifts between angles, helping viewers follow your instructions easily. Think about where to position your camera to capture the most relevant view, making sure your hands and the craft are clearly visible. By selecting the right key angles, you can guide viewers’ attention and make your tutorial more effective. Additionally, understanding how to recognize early warning signs of issues can help you address potential problems before they affect your demonstration. Proper planning and awareness of potential technical difficulties can save time and maintain the flow of your tutorial. This careful planning ensures your audience learns efficiently and stays engaged throughout your demonstration.
Use Consistent Framing
Consistent framing is essential for creating a professional and easy-to-follow craft tutorial. When you maintain framing consistency, viewers can focus on the process without confusion. To achieve this, ensure your camera remains stable throughout the shoot, avoiding unnecessary movement. Use a tripod or stabilizer to keep the camera steady, which enhances camera stability and prevents shaky footage. Plan your shots carefully, sticking to the same framing style for close-ups, wide shots, and detail views. This planning helps maintain visual continuity, allowing viewers to follow along seamlessly. Avoid abrupt changes in camera angles or framing, as they can distract or confuse your audience. Maintaining camera stability is crucial for clear visuals. Consistent framing creates a smooth viewing experience, making your tutorial more engaging and instructive.
Use Lighting and Focus Techniques to Clearly Show Details
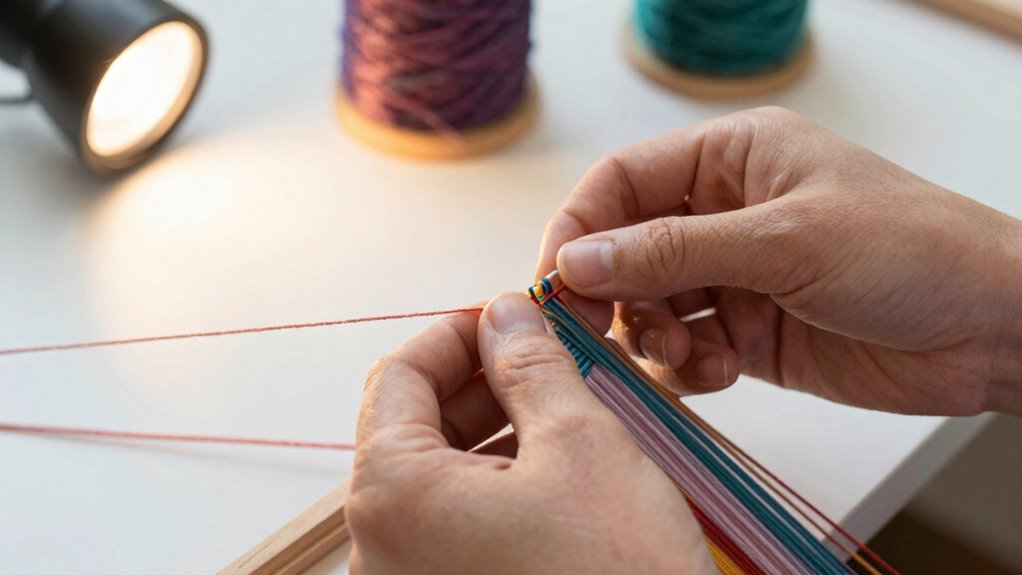
Good lighting is essential for highlighting the intricate details of your craft. Proper lighting, combined with focus techniques, guarantees viewers can see each step clearly. To achieve this:
- Use macro lighting to illuminate small details without harsh shadows. Incorporating well-balanced lighting helps create an even illumination that showcases textures effectively. Additionally, using consistent lighting quality prevents flickering or uneven exposure during filming.
- Adjust focal depth to keep your work in sharp focus, especially for close-up shots.
- Use soft, diffused light to minimize glare and highlight textures.
- Focus on key elements, and switch focus smoothly to guide viewers’ attention.
- Be mindful of indoor air quality to prevent dust or particles from causing glare or distracting spots in your footage. Good air quality can also reduce static that might interfere with your camera equipment.
Incorporate Voiceovers and Visual Cues to Reinforce Steps

Adding voiceovers and visual cues can considerably enhance your craft demonstration by guiding viewers through each step and emphasizing important details. Voiceover guidance helps clarify complex procedures, ensuring viewers understand exactly what to do. Use clear, concise narration that complements your visuals, avoiding confusion. Meanwhile, visual cue integration can highlight key actions or materials, like arrows, text overlays, or symbols, making it easier for viewers to follow along. Incorporating visual learning techniques can further improve viewer comprehension and retention. Combining these techniques ensures your audience stays engaged and absorbs the information more effectively. When planning your video, think about how your voiceovers can reinforce the visuals, and how visual cues can direct attention to critical steps. This synergy creates a more cohesive and educational experience, making your craft demonstration both accessible and memorable.
Edit Your Video for Clarity, Engagement, and Learning
When editing your video, focus on ensuring visuals and audio are clear so viewers can easily follow along. Highlight key steps with zooms or text to keep your audience engaged and reinforce important points. Using dynamic editing techniques can make your demonstration more lively and improve overall learning. Incorporating celebrity-inspired styles can also boost viewer interest and make your content more fashionable and appealing. Additionally, applying visual clarity techniques such as proper lighting and stabilization can greatly enhance viewer comprehension and retention. To further improve understanding, consider using active voice to make instructions more direct and engaging. Recognizing the importance of high-quality pinball machines can inspire you to include compelling visuals that captivate your audience and demonstrate craftsmanship effectively.
Clear Visuals and Audio
To guarantee your craft demonstration is clear and engaging, focus on editing your video to enhance both visuals and audio. Good visual clarity ensures viewers can see details, while high audio quality makes instructions easy to understand. Here are four tips to improve your edit:
- Adjust brightness and contrast for better visual clarity.
- Cut out distracting background noise and add clear voiceovers if needed.
- Use zooms or highlights to emphasize key steps.
- Make sure audio levels are balanced so instructions are easy to follow.
Highlight Key Steps
Ever wonder how to make your craft demonstration more memorable and easy to follow? Highlighting key steps helps viewers focus on essential techniques and craft supplies needed. When editing, emphasize these moments with clear close-ups and concise instructions. Use visual cues like arrows or text overlays to draw attention to important actions. Incorporate safety tips throughout, especially when handling sharp tools or hot glue, to keep viewers safe. Cutting out unnecessary details keeps the flow smooth and engaging. By spotlighting the main steps, you help your audience grasp the process quickly and confidently. Remember, clarity in your edits guarantees they can easily replicate your craft, making the learning experience enjoyable and effective.
Use Engaging Editing Techniques
Engaging editing techniques transform a basic craft demonstration into a mesmerizing learning experience. By harnessing visual storytelling and pacing techniques, you keep viewers interested and help them absorb information. First, cut unnecessary footage to maintain a steady flow, ensuring your video stays engaging. Second, use close-ups strategically to highlight key steps and details. Third, add transition that guide viewers smoothly from one stage to the next, enhancing clarity. Finally, incorporate pacing techniques like slow-motion for tricky parts or quick cuts for transitions to keep energy high. These edits help clarify complex actions, emphasize important moments, and maintain viewer interest. When you edit thoughtfully, your craft demonstration becomes not just informative but captivating, encouraging viewers to learn and try themselves.
Tips for Uploading and Sharing Your Craft Demo Effectively

Sharing your craft demo online is a great way to reach a wider audience, but it’s important to upload and present your video effectively. Start with a compelling thumbnail design that clearly shows your project, enticing viewers to click. When posting on social media, craft a catchy caption and use relevant hashtags to increase visibility. Keep your video title concise and descriptive so viewers understand what they’ll learn. Consider adding a brief description with key points or time stamps to make your content more accessible. Always review your upload to guarantee quality and clarity before sharing. Engaging visuals and clear messaging will help your craft demo stand out, encouraging more viewers to learn from your tutorial and share it with others.
Frequently Asked Questions
How Can I Make My Craft Tutorial More Engaging?
You can make your craft tutorial more engaging by incorporating interactive storytelling and strong visual storytelling techniques. Show the step-by-step process clearly, add close-ups, and explain your actions with enthusiasm to keep viewers interested. Use visuals to highlight key details, and ask questions to encourage interaction. Keep the pace lively and relatable, so your audience feels involved and inspired to try the craft themselves.
What Are Common Mistakes to Avoid in Filming Craft Demos?
To avoid common mistakes in filming craft demos, watch out for lighting mistakes that can obscure details and make your video hard to follow. Keep your camera steady to prevent shake, which distracts viewers and reduces clarity. Use proper lighting and a tripod, and check your shots before recording. Avoid rushing through steps, and make sure your camera settings are optimized for clear, crisp visuals.
How Long Should a Craft Demonstration Video Ideally Be?
You should aim for a craft demonstration video around 8 to 10 minutes long, balancing detail with viewer retention. Longer videos risk losing your audience’s interest, while shorter ones may omit essential steps. Keep the pace engaging and focused, so viewers stay hooked. By structuring your content wisely, you’ll maximize viewer retention and ensure your audience learns every detail without feeling overwhelmed or bored.
Which Editing Tools Are Best for Beginner Craft Videographers?
As a beginner craft videographer, you should try user-friendly editing tools like iMovie or DaVinci Resolve. These offer features like basic motion graphics to enhance your videos and simple color grading options to improve visuals. You’ll find them easy to learn and perfect for polishing your craft demos without feeling overwhelmed. Start with these tools, experiment with motion graphics and color grading, and you’ll see your videos improve quickly.
How Do I Ensure My Craft Tutorial Reaches the Right Audience?
To make certain your craft tutorial reaches the right audience, start with target audience analysis to understand their interests and preferences. Then, optimize your content for specific platforms by using relevant keywords, engaging titles, and appropriate tags. Share your videos on social media groups and forums where craft enthusiasts gather. Consistently engage with viewers, ask for feedback, and adapt your content to better meet their needs.
Conclusion
By mastering these filming techniques, you’re crafting a clear path for your viewers, turning your demonstration into a shining beacon of inspiration. Think of your video as a well-tended garden—each detail carefully nurtured, every shot a blooming flower guiding learners along. With your thoughtful approach, you’ll transform simple steps into a mesmerizing journey, making your craft demo not just watched but truly learned from. So, grab your camera and let your creativity blossom!