
When filming in murky water, choose an underwater camera with good low-light performance, fast autofocus, and strong image stabilization. Use waterproof housing, external lighting like strobes, and shoot close to your subjects to reduce backscatter. Adjust camera settings: white balance, ISO, and aperture for clarity. Keep your gear clean and maintained, and practice good composition techniques. Curious how to get the best shots? Keep exploring for more expert tips.
Key Takeaways
- Choose cameras with strong low-light performance, high ISO capabilities, and fast autofocus for better clarity in murky waters.
- Use external strobes or continuous lighting positioned to minimize backscatter and enhance color vibrancy.
- Adjust white balance manually or select underwater preset modes to correct color distortions caused by poor visibility.
- Keep the camera close to subjects and optimize angles to reduce particles and glare, improving image sharpness.
- Regularly maintain and clean equipment to prevent saltwater damage and ensure consistent, clear footage.

Jiisquilyx Portable Fish Finder with Underwater Camera: IP68 Waterproof 5 Inch IPS Display for Ice/Lake Fishing & Murky Conditions| Depth Finder for Ice Fishing/Boats/Kayaks with 8000mAh Battery
- High Brightness IPS Display: 1500 nits brightness with foldable sunshade
- Clear Underwater Imaging: Sharp visuals of fish, vegetation, and bottom structures
- Enhanced Night Vision: 220° lens with 8 infrared LEDs for low-light conditions
As an affiliate, we earn on qualifying purchases.
As an affiliate, we earn on qualifying purchases.
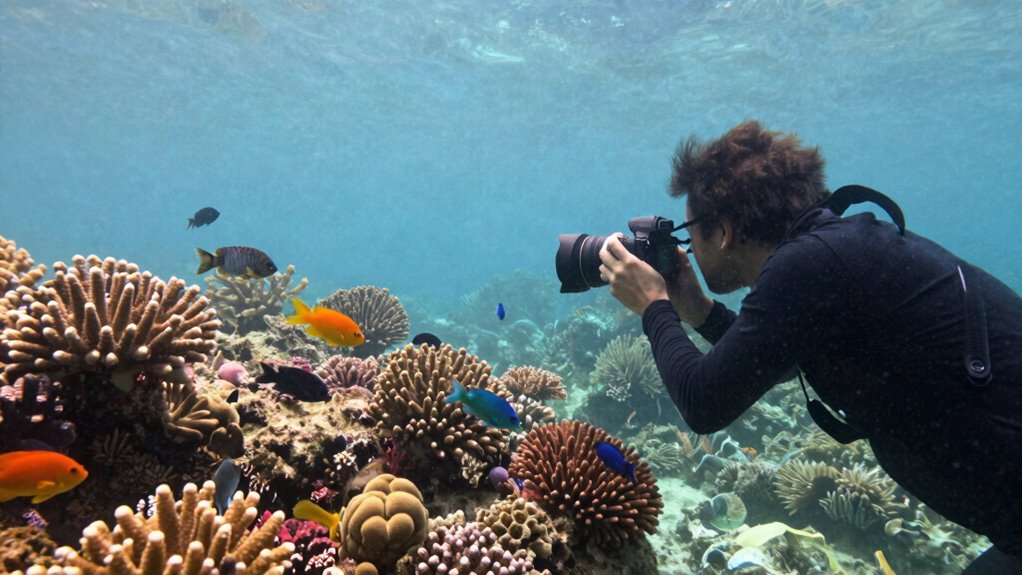
Why Murky Water Makes Underwater Photography So Difficult
Murky water considerably complicates underwater photography because it limits visibility and reduces the clarity of your images. When water is cloudy, light doesn’t travel well, making it harder to capture sharp, vibrant photos. Marine life becomes harder to spot and focus on, often hiding behind particles or blending into the background. Water clarity diminishes, causing images to appear dull or hazy. This reduced visibility challenges your ability to frame shots properly and can result in blurry or indistinct pictures. Additionally, water quality plays a crucial role in determining how successful your underwater photography efforts will be in these conditions. Understanding how nail biology and care can influence overall health and resilience may also be relevant if handling equipment or managing physical strain during dives. Recognizing the impact of water filtration and maintenance practices can further help in assessing and improving water clarity for better photography outcomes. Proper water testing can help identify pollutants that contribute to murkiness and guide corrective actions.
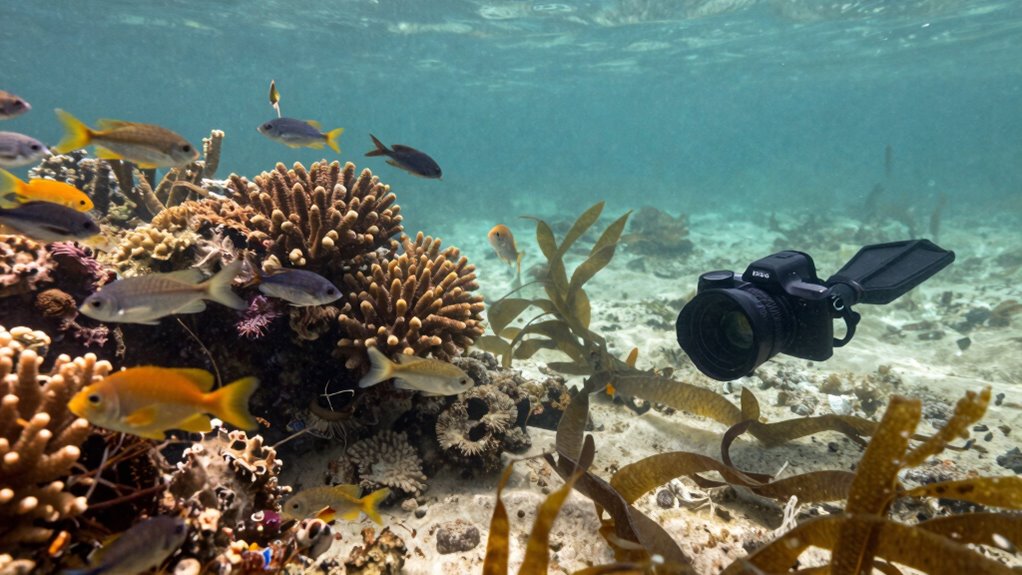
Choosing the Best Underwater Camera for Murky Waters

When choosing an underwater camera for murky waters, it’s essential to prioritize features that enhance visibility and image clarity. Look for a camera with robust camera waterproofing to prevent water damage and guarantee durability in challenging conditions. An underwater housing is vital, especially if you plan to plunge in deeper or rough waters, as it protects the camera while maintaining access to controls. Consider models with good low-light performance and high ISO capabilities, which help capture clearer images in low visibility environments. Additionally, check for fast autofocus and image stabilization to reduce blur caused by movement. By selecting a camera designed for harsh conditions with reliable waterproofing and protective underwater housing, you’ll improve your chances of capturing sharp, vibrant footage even in murky waters. Ensuring that the camera has certified waterproofing can provide added assurance of its reliability in demanding underwater environments. Investing in waterproof accessories can further enhance your underwater photography experience and protect your equipment from moisture and debris. Exploring options with advanced sensor technology can also significantly improve image quality in low-visibility conditions. Moreover, choosing a camera with robust construction will help it withstand the demanding underwater environment and prolong its usability. Incorporating proper maintenance routines can ensure your equipment remains in optimal condition over time.
Must-Have Gear to Get Clearer Shots in Low Visibility
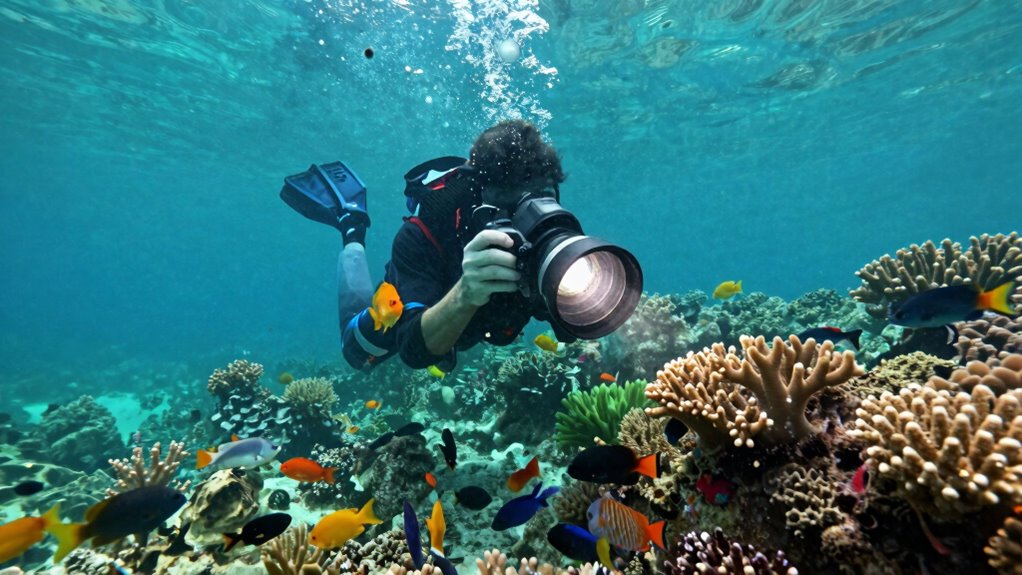
To improve your shots in low visibility, you need to master proper lighting techniques that cut through murky water. Choosing high-quality lenses also makes a big difference in capturing sharp, clear images. These gear essentials help you get better results even when conditions aren’t ideal.
Use Proper Lighting Techniques
Proper lighting is essential for capturing clear images in low-visibility underwater environments. You can improve your footage by mastering flashlight techniques, such as angling your beam to avoid backscatter and illuminating your subject evenly. Using underwater lighting gear like strobes or continuous lights helps brighten the scene and restore color lost in murky water. Position your lights carefully to minimize shadows and reflections, and avoid shining directly into the camera lens. Keep your lights in good condition and ensure they’re waterproof and compatible with your camera setup. Proper lighting not only enhances visibility but also reveals details that would otherwise be hidden. Additionally, understanding the essential oils for underwater photography can help maintain equipment performance and reduce fogging issues. Employing appropriate light positioning techniques can further optimize image clarity and reduce unwanted glare. Regularly inspecting and cleaning your lighting gear can prevent microplastics in dust from accumulating, which might affect light quality and equipment longevity. Using waterproof gear maintenance practices can extend the lifespan of your lighting equipment and ensure consistent performance. Selecting the right underwater lighting gear is crucial for achieving optimal illumination in murky conditions. With effective flashlight techniques and reliable underwater lighting gear, you’ll considerably improve your chances of capturing sharp, vibrant footage in challenging conditions.
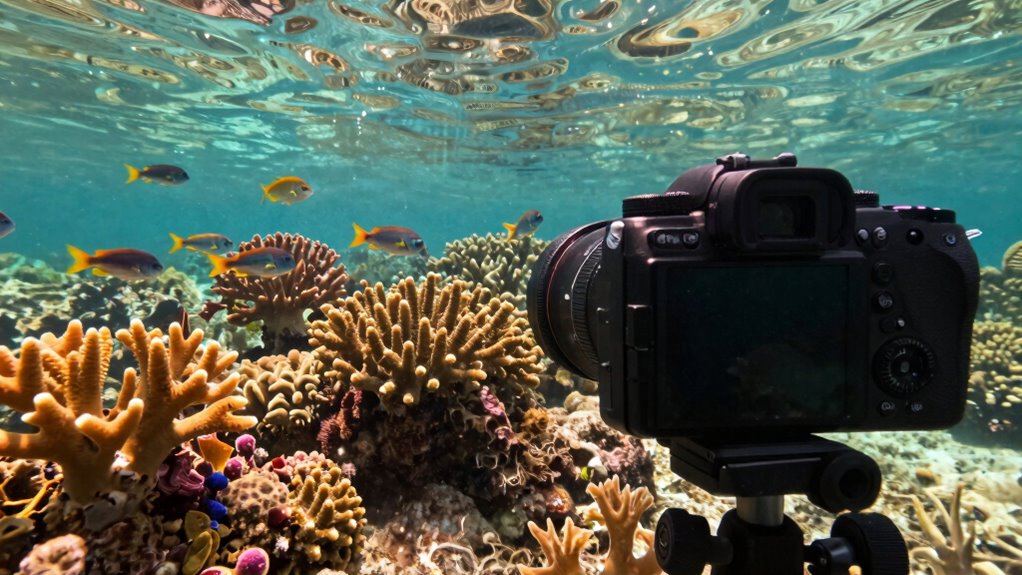
Select High-Quality Lenses
Choosing the right high-quality lens is essential for capturing sharp, clear images in low-visibility underwater environments. A good lens enhances lens quality and helps you manage aperture selection effectively, ensuring your shots stay bright and detailed despite murky water. Look for lenses with wide apertures (f/2.8 or lower) to allow more light in and improve clarity. Consider the following factors:
| Feature | Benefit | Recommendation |
|---|---|---|
| Lens Quality | Reduces distortion, boosts sharpness | Choose premium glass lenses |
| Aperture Selection | Controls light intake, depth of field | Opt for wide apertures |
| Compatibility | Fits your underwater camera system | Verify mount compatibility |
Prioritize these to maximize image quality and visibility in challenging conditions. An understanding of lens quality can greatly influence your ability to capture clear footage in complex underwater environments.
Key Camera Settings for Sharp, Vibrant Underwater Footage
To get sharp, vibrant underwater footage, you need to fine-tune your camera settings carefully. Adjusting the white balance guarantees your colors stay true, while optimizing ISO helps manage light in low-visibility conditions. Mastering these settings will make your footage stand out with clarity and vividness. Additionally, familiarizing yourself with home life tips can help maintain your equipment in optimal condition, ensuring consistently high-quality results. Regularly inspecting and cleaning your camera equipment is also essential to prevent equipment damage caused by saltwater and sediment buildup, which aligns with embracing diversity in industry standards. Being aware of best practices for maintenance can further extend your gear’s lifespan and performance in challenging underwater environments.
Adjust White Balance
Adjusting white balance is essential for capturing clear, vibrant underwater footage because it corrects color distortions caused by water’s filtering effect. Water absorbs and scatters light, often resulting in a bluish or greenish tint that dulls your footage. By setting the white balance correctly, you ensure that colors appear natural and true to life. Many cameras have automatic white balance, but adjusting it manually gives you better control over color correction, especially in murky or variable conditions. Use preset modes like “underwater” or manually fine-tune the white balance to match your environment. Proper white balance settings help your footage look sharp and vibrant, preventing color cast issues and ensuring your videos accurately reflect the underwater scene. Additionally, understanding how contrast ratio influences image quality can help you capture more detailed and dynamic footage in challenging lighting conditions. For optimal results, consider camera sensor quality, as it significantly impacts the clarity and color accuracy of your underwater videos.
Optimize ISO Settings
Optimizing ISO settings is crucial for capturing sharp, vibrant underwater footage because it directly affects the camera’s sensitivity to light. When you adjust ISO, aim for ISO optimization that balances brightness with minimal camera noise reduction. Higher ISO increases sensitivity, helping you shoot in murky conditions, but it can introduce grainy noise. To maintain clarity, start with the lowest ISO possible and increase only when necessary. Modern cameras often have noise reduction features—use these to keep your footage clean. Keep in mind that excessive ISO can compromise image quality, so find a sweet spot for your specific environment. Additionally, accessibility features can assist users in monitoring and adjusting camera settings more effectively. Understanding family photoshoot fails can help you anticipate and avoid common issues that might affect your footage in unpredictable conditions. By carefully managing ISO settings, you’ll achieve sharper, more vibrant footage even in challenging underwater conditions.
Lighting and Composition Tips for Murky Water Shooting
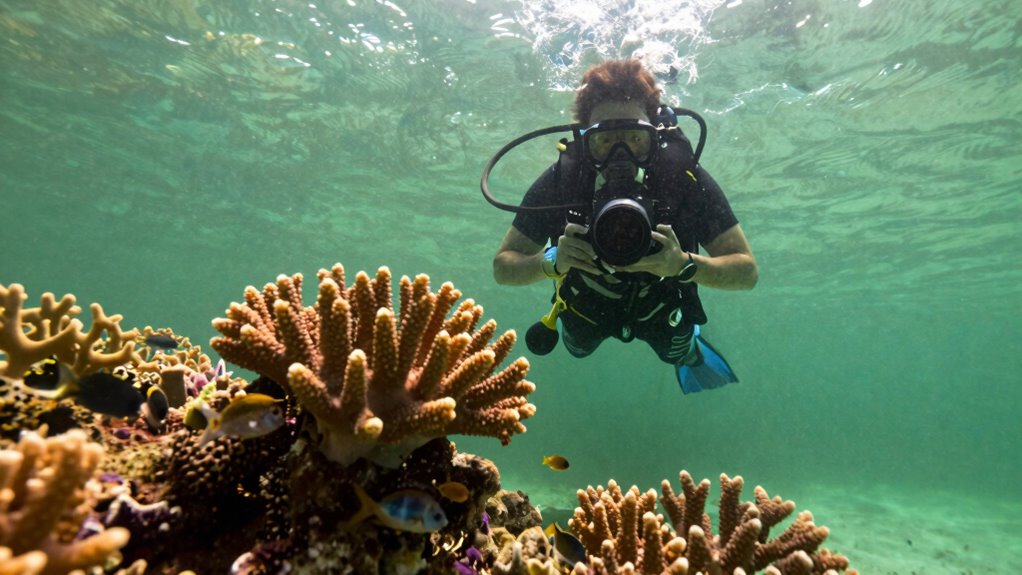
When shooting in murky waters, proper lighting is essential to bring clarity and detail to your underwater photos. Use external lights or strobes to reduce shadows and enhance color vibrancy. Good lighting minimizes the need for heavy color correction later. Additionally, consider underwater accessories like diffusers to soften light and prevent washed-out images. Composition-wise, shoot close to your subject and aim for an angle that minimizes backscatter. Keep these tips in mind:
| Tip | Why it helps | Example |
|---|---|---|
| Use external strobes | Improves color and clarity | Brightens murky coral |
| Minimize distance | Reduces particles in the shot | Closer shots stay clearer |
| Adjust angle to sun | Avoid backscatter and glare | Shooting at an angle |
Applying these tips will improve your footage’s quality and make post-processing easier.
Post-Processing Techniques to Brighten Murky Underwater Footage

Enhancing murky underwater footage through post-processing can considerably improve visibility and color. Start with color correction to restore natural hues lost in low-light conditions. Adjust white balance and contrast to make the scene brighter and more vibrant. Noise reduction is also essential, as murky water often introduces graininess that hampers clarity. Use noise reduction tools to smooth out pixelation without sacrificing detail. Be cautious not to overdo these adjustments, which can create unnatural looks or blur fine features. Applying these techniques carefully helps brighten your footage and reveals details obscured by murkiness. Ultimately, effective color correction combined with noise reduction transforms dull, murky clips into clearer, more appealing visuals that better capture underwater scenes.
Common Mistakes to Avoid When Shooting in Murky Water
Shooting in murky water presents unique challenges, and overlooking common mistakes can result in unusable footage. One mistake is neglecting equipment durability; ensure your camera is built for harsh conditions to prevent damage. Poor underwater communication can lead to disorganized shots or missed opportunities — use reliable signals or communication tools. Additionally, avoid rushing your shot; murky water requires patience and careful framing.
| Mistake | Solution |
|---|---|
| Ignoring equipment durability | Use rugged, waterproof gear |
| Poor underwater communication | Use clear signals or communication devices |
| Rushing shots | Take your time to compose carefully |
Maintenance Tips to Keep Your Underwater Camera in Top Shape

Maintaining your underwater camera is key to capturing clear footage in challenging conditions like murky water. Regular camera cleaning prevents dirt and algae buildup that can distort images, while proper battery maintenance ensures your device stays powered during dives. To keep your camera in top shape, follow these tips:
Regular cleaning and proper battery care keep your underwater camera performing at its best.
- Rinse your camera with fresh water after each dive to remove salt and debris
- Use a soft cloth or brush for gentle camera cleaning, avoiding scratches
- Store batteries in a cool, dry place and recharge before each use
- Check battery levels frequently and replace or recharge as needed
Frequently Asked Questions
How Does Water Temperature Affect Underwater Camera Performance?
Water temperature effects your underwater camera performance by influencing its battery life and lens clarity. When water is colder, batteries drain faster, and the camera may struggle to focus or produce clear images. Warmer water generally improves performance, but extreme temperatures can still cause issues. To guarantee ideal results, choose cameras designed for various temperatures, and consider using heated housings or temperature-resistant equipment to maintain clear footage in different water conditions.
Can Underwater Cameras Handle Strong Currents and Turbulence?
Think of your camera as a sturdy ship steering stormy seas. It can handle strong currents and turbulence if it’s built with high current resistance and turbulence management features. Look for models with reinforced housings, advanced stabilizers, and secure mounts. These elements guarantee your camera stays steady and functional amidst turbulence, letting you capture clear footage even in the most turbulent waters. Proper preparation makes all the difference.
What Are the Best Storage Options for Underwater Footage?
You should use high-capacity, waterproof memory cards to store underwater footage securely. For extra safety, back up your videos to cloud storage whenever you’re back on land, ensuring your footage stays protected even if your memory card gets damaged. Choose cards with fast write speeds to capture high-quality video seamlessly, and regularly transfer files to cloud platforms for easy access and long-term storage.
How Long Can Underwater Cameras Operate Continuously in Murky Water?
Think of your underwater camera as a marathon runner—its battery life and power management are key. In murky water, most cameras run continuously for 4 to 8 hours, depending on battery capacity and usage. To extend operation, optimize power settings, turn off unnecessary features, and carry spare batteries. I once documented a 6-hour dive, switching batteries mid-way, proving careful power management keeps your footage flowing smoothly.
Are There Specific Brands Known for Better Durability in Low Visibility Conditions?
Yes, some brands stand out for their durability and low visibility performance. You should consider GoPro, SeaLife, and Kraken Sports, as they design cameras with rugged build quality that resist corrosion and water pressure. These brands focus on low visibility performance, ensuring clear footage even in murky conditions. When choosing, check for features like reinforced housings and specialized lenses to maximize your underwater experience.
Conclusion
Exploring murky waters is like trying to find sparkle in a cloudy sky, but with the right gear and techniques, you can bring your underwater scenes to life. Remember, patience and practice are your best friends—each shot is a step closer to crystal-clear footage. Keep your gear maintained, experiment with settings, and don’t be afraid to get creative. Soon, you’ll turn murky depths into a vibrant, engaging world that truly shines.