To stop feedback screeching forever, start by properly placing your microphones close to sound sources and away from speakers, using directional mics when possible. Keep volume levels moderate and use EQ to cut problematic frequencies. Regularly perform soundchecks to identify feedback and adjust settings accordingly. Using feedback eliminators can also automatically suppress squeals. Maintaining equipment, checking wiring, and addressing room acoustics are key. Keep these tips in mind, and you’ll master a feedback-free sound system—more details to help you succeed await.
Key Takeaways
- Proper microphone placement away from speakers and aimed away from sound sources reduces feedback risk.
- Use equalization to cut problematic frequencies that cause feedback loops.
- Gradually increase volume during soundcheck while monitoring for squeals to set optimal levels.
- Employ feedback suppression tools that automatically identify and suppress feedback frequencies.
- Regularly maintain equipment, check cables, and ensure proper system setup to prevent feedback issues.
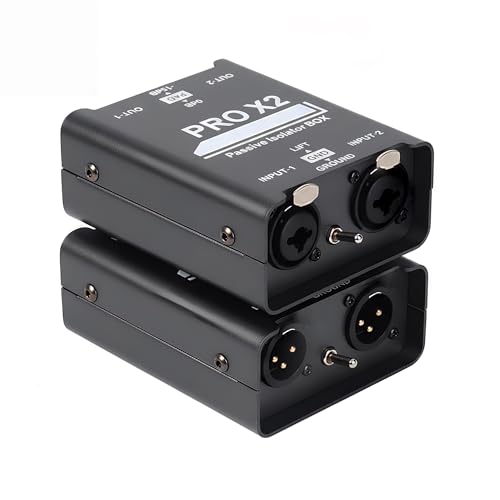
PRO X2 Passive Ground Loop Isolator, 2-Channel Stereo Direct Box Audio Static Feedback Hum Eliminator, XLR/6.35mm to XLR for Live Sound System Broadcast Studio Streaming
CRYSTAL-CLEAR, NOISE-FREE AUDIO – Ground Loop Isolator Hum Eliminator instantly eliminates the annoying hum, buzz, and static caused…
As an affiliate, we earn on qualifying purchases.
As an affiliate, we earn on qualifying purchases.
What Causes Feedback and How to Recognize It

Have you ever wondered why your PA system suddenly squeals or how to tell if feedback is happening? It often comes down to microphone sensitivity and speaker volume. When your microphone is too sensitive, it picks up sounds from the speakers, creating a loop. Increasing the speaker volume amplifies this effect, making feedback more likely. You’ll notice a high-pitched squeal or screech when the mic and speakers are too close or improperly adjusted. Feedback occurs when sound from the speakers re-enters the microphone, gets amplified, and loops back again. Recognizing this sound early helps you adjust settings quickly. Lowering the microphone sensitivity or reducing the speaker volume can often stop the squeal. Understanding these factors helps you prevent feedback before it becomes disruptive. Additionally, proper placement and feedback elimination techniques can improve sound clarity and reduce the likelihood of feedback. Being aware of sound system configuration can also assist in avoiding common feedback issues and maintaining clear audio.

Digital Sound Level Meter Calibrator 94dB & 114dB for 1/2" and 1" inch Microphone, Professional Noise Decibel Calibration Tool Measurement Accuracy Check
SIMPLE OPERATION : With only 3 buttons: 94dB, 114dB and Power On/Off Button. Simply power on the calibrator,…
As an affiliate, we earn on qualifying purchases.
As an affiliate, we earn on qualifying purchases.
How Microphone and Speaker Placement Affects Feedback
Proper placement of microphones and speakers is essential for minimizing feedback. If your microphone picks up sound directly from a speaker, you’ll likely experience squealing. Different microphone types, like dynamic or condenser, react differently to placement, so choose wisely. Keep microphones away from speakers and avoid pointing them directly at each other. Proper speaker placements also matter: position speakers to direct sound toward the audience, not back toward microphones. Use the following table to help visualize effective placement:
| Microphone Types | Placement Tips | Speaker Placement |
|---|---|---|
| Dynamic | Keep away from speakers | Face toward audience |
| Condenser | Use directional mics | Avoid pointing at microphones |
| Wireless | Maintain distance from speakers | Elevate speakers if possible |
Placing equipment correctly reduces feedback risk and ensures clear sound. Additionally, using appropriate microphone types for specific situations can further decrease feedback chances. Being aware of microphone polar patterns helps in selecting the optimal microphone for various scenarios, further minimizing feedback issues.

Podcast Equipment Bundle, Recording Studio Package with Podcast Microphone and Voice Changer, Live Sound Card – Audio Interface for Laptop Computer Vlog Living Broadcast Live Streaming YouTube TikTok
【Studio-Grade Sound Quality】This podcast bundle features Smart Noise Reduction System and 360° omnidirectional capture technology for vocal precision….
As an affiliate, we earn on qualifying purchases.
As an affiliate, we earn on qualifying purchases.
Tips for Proper Microphone and Speaker Placement
To get the best sound, you need to position your microphones carefully, keeping them close enough to pick up voices clearly without causing feedback. Make sure your speakers are aimed away from microphones and placed at a safe distance to prevent sound from looping back. Proper placement involves balancing microphone proximity and speaker direction to ensure clear, feedback-free sound. Additionally, using feedback suppression techniques can help prevent screeching and maintain audio clarity. Incorporating proper acoustic treatment can further minimize reflections and standing waves that contribute to feedback issues. For optimal results, consider soundproofing your space, which can further reduce unwanted noise and prevent feedback issues. Being mindful of room acoustics and sound reflection control can also significantly improve overall audio quality.
Optimal Microphone Placement
Placing microphones correctly can considerably improve sound quality and reduce feedback during a PA system setup. Start with proper microphone orientation; aim the mic toward the sound source and away from speakers to minimize unwanted noise and feedback. Keep the microphone close to the mouth or instrument for clearer sound and better gain before feedback. When considering speaker positioning, avoid placing speakers directly behind or above microphones, as this can create a loop of sound that causes screeching. Instead, position microphones at an appropriate distance from speakers, ensuring sound flows naturally into the mic without picking up excessive reflected sound. Proper placement helps maintain clarity and prevents feedback, making your PA system more reliable and easier to operate during live events. Additionally, understanding sound propagation principles can further enhance your setup by optimizing how sound travels in the space.
Speaker Direction and Distance
Adjusting the direction and distance of your speakers is key to achieving clear sound and minimizing feedback. Proper speaker orientation ensures sound projects toward your audience, not back toward microphones, reducing the chance of feedback loops. Point speakers slightly downward or upward, depending on the venue, to avoid sound bouncing directly into microphones. Distance management is equally important; place speakers far enough away from microphones to prevent pickup of speaker sound, but close enough for even coverage. Keep speakers at least a few feet from performers and audience members when possible. Regularly check angles and distances during setup, adjusting as needed to optimize sound clarity. Additionally, understanding the importance of sound coverage helps in positioning speakers effectively for consistent audio quality throughout the venue. Proper speaker placement also reduces the need for excessive equalization, which can introduce feedback. Ensuring optimal speaker placement enhances overall sound quality and minimizes the chances of feedback screeching. Properly managing sound feedback is essential for a clear and comfortable listening experience for your audience. Paying attention to acoustic environment factors can further improve sound clarity and reduce feedback issues.

MIZISNR Stereo Graphic Equalizer 15-Band EQ for Home Audio System, Rack Mount Dual Channel Pro DJ Equalizer with Subwoofer Output, Noise Reduction (EQX-215S)
Professional Dual-Channel Stereo Graphic Equalizer: Elevate your audio game with this high-performance dual-channel stereo graphic equalizer, meticulously crafted…
As an affiliate, we earn on qualifying purchases.
As an affiliate, we earn on qualifying purchases.
How to Adjust Sound Levels and EQ to Prevent Feedback

To prevent feedback, you need to set your volume levels correctly so they aren’t too high. Using equalization strategically can help cut frequencies that cause squealing, while careful microphone placement minimizes the chance of feedback. Focus on these points to keep your sound clear and feedback-free. Additionally, understanding the concept of Free Floating can help you optimize your sound system setup for better stability.
Set Appropriate Volume Levels
Ever wonder how to keep your sound levels in check to prevent feedback? It all comes down to proper volume control and loudness management. Start by setting your main volume at a moderate level, then gradually increase until you reach a comfortable loudness without pushing into danger zones. Keep individual microphone and instrument levels balanced to avoid overwhelming the system. Remember, higher volume levels increase the risk of feedback, so avoid cranking the sound system too high. Use your mixer’s gain controls wisely, ensuring signals are strong but not distorted. Regularly monitor and adjust during your soundcheck or performance, maintaining consistent loudness. Practicing sound system fundamentals helps in understanding how different components interact and impact feedback. By managing your volume levels carefully, you create a clean, feedback-free environment that enhances clarity and audience experience.
Use Equalization Strategically
Using equalization effectively can make a significant difference in preventing feedback and achieving clear sound. By adjusting your audio spectrum, you can reduce problematic sound wave frequencies that cause feedback. Focus on identifying and cutting frequencies where feedback peaks, usually in the midrange or upper spectrum. Use a graphic or parametric EQ to target these specific areas without sacrificing overall audio quality. Remember, each sound source and room environment is different, so take the time to listen carefully and make incremental adjustments. This strategic use of EQ helps control resonances and minimizes feedback loops. With practice, you’ll develop an ear for pinpointing troublesome frequencies and applying precise cuts, ensuring your PA system delivers clean, feedback-free sound.
Position Microphones Carefully
Proper microphone placement is essential for preventing feedback and maintaining clear sound. You need to consider microphone positioning carefully—placing mics too close to speakers can cause unwanted feedback, while too far away reduces sound clarity. Aim to position microphones at an ideal distance, pointing away from speakers to minimize sound bleed. Additionally, monitor filter indicators if available on the device to ensure optimal performance. Adjust speaker placement to prevent direct sound from hitting the microphone’s pickup area, which can lead to screeching. Use directional microphones when possible, as they focus on the source and reject ambient noise. Regularly test and reposition microphones during setup to find the sweet spot where sound is clear and feedback is minimized. Proper coordination of microphone positioning and speaker placement is key to stopping feedback screeching forever. Additionally, selecting the right microphone type can significantly improve feedback control by focusing on the intended sound source. Incorporating feedback elimination technology can further help monitor and reduce potential squeals during live performances. Paying attention to sound levels and adjusting them appropriately also plays a crucial role in preventing feedback issues. Implementing sound level adjustments based on room acoustics can further enhance overall sound quality and feedback prevention.
Using Feedback Eliminators to Stop Screeching
Screeching feedback can be frustrating during a live event, but feedback eliminators offer an effective solution. These devices analyze the sound in real-time, pinpointing the specific frequencies causing feedback. Once identified, feedback eliminators automatically suppress those frequencies, preventing screeching before it starts. Unlike sound masking, which subtly adjusts ambient noise levels, feedback eliminators directly target problematic sounds, offering immediate relief. They are especially useful in dynamic environments where sound sources or speaker placements change frequently. By installing a feedback eliminator, you create a smoother, more professional sound experience for your audience. Remember, combining feedback eliminators with proper microphone placement and sound masking techniques ensures a thorough approach to stopping screeching and maintaining clear, feedback-free sound.
Choosing the Right Microphones and Speakers for Clear Sound
Selecting the right microphones and speakers is essential for achieving clear, high-quality sound at your event. Start by understanding microphone types—dynamic mics are durable and handle loud sounds well, making them ideal for live performances, while condenser mics capture detailed sound, perfect for speeches or vocals. When choosing speakers, focus on speaker selection that matches your venue size and acoustics; larger spaces need more powerful, full-range speakers, while smaller rooms benefit from compact, high-quality options. Guarantee your speakers deliver balanced sound without distortion, and position them correctly to avoid dead spots or feedback issues. By carefully matching microphone types and selecting the appropriate speakers, you’ll create a setup that enhances clarity, minimizes feedback, and provides a professional sound experience for your audience.
Conducting a Soundcheck to Detect and Fix Feedback
Before you start, make sure your equipment is properly set up and powered on. Listen carefully for any distortions or squeals that indicate feedback issues. Make quick adjustments to improve clarity and eliminate feedback before your event begins.
Prepare Your Equipment
To guarantee your PA system runs smoothly, start by conducting a thorough soundcheck to detect and fix feedback issues. First, ensure your equipment is properly prepared. Manage cables neatly to prevent interference and accidental disconnections. Make sure all power sources are stable and surge-protected to avoid interruptions. Proper cable management reduces noise and confusion during setup, while reliable power ensures consistent performance. Double-check connections and placement of microphones and speakers to prevent feedback loops. Use the table below to review key setup tips:
| Tip | Explanation |
|---|---|
| Organize cables | Prevent tangling and interference |
| Secure power sources | Avoid power surges or outages |
| Check equipment placement | Minimize feedback risk |
Listen for Distortions
When you start your soundcheck, listen carefully for any distortions or unusual noises in the audio. Pay close attention to signs of feedback cycles, which often produce a screeching or ringing sound. These feedback cycles can cause distortion, making your audio unpleasant and hard to understand. Practice distortion recognition by identifying when sound quality begins to degrade or whines emerge. If you notice these issues, it indicates that your microphone might be too close to speakers or that levels are too high. Address distortions early by adjusting your microphone placement, gain, or volume. Being vigilant during this phase helps you catch feedback problems before they escalate into loud screeches, ensuring a clean, clear sound for your event.
Adjust for Clarity
After identifying and addressing distortions during your soundcheck, the next step is to fine-tune your system for maximum clarity. Start by adjusting your microphone placement, ensuring you follow proper microphone etiquette to avoid feedback. Use soundproofing techniques, like acoustic panels or foam, to reduce echo and unwanted noise. During the check, listen carefully to how each element interacts, tweaking EQ settings to enhance clarity. Keep your microphone gain low enough to prevent overload but high enough to capture clear sound.
| Step | Technique | Goal |
|---|---|---|
| Microphone etiquette | Maintain proper distance and angle | Minimize feedback |
| Soundproofing | Add acoustic treatments | Reduce echo and noise |
| EQ adjustments | Boost mids, cut lows and highs as needed | Enhance clarity |
Troubleshooting Persistent Feedback Problems: When to Call a Pro
Persistent feedback problems can be frustrating, especially when basic troubleshooting steps don’t do the trick. If you’ve tried repositioning mics, adjusting volumes, and checking cables without success, it’s time to contemplate calling a professional. Audio visual experts understand sound ethics and can quickly diagnose complex issues that might be causing persistent feedback. They can evaluate your system’s setup, identify hidden problems, and guarantee your equipment is used effectively. Sometimes, feedback stems from underlying issues like faulty components or improper acoustics that require specialized tools and expertise. Hiring a pro isn’t a sign of failure; it’s a smart move to protect your audio quality and avoid damaging your equipment. Trusting a professional ensures your system operates smoothly and responsibly, saving you time and frustration.
Maintenance Tips to Keep Your PA System Feedback-Free
Regular maintenance is essential to prevent feedback issues and keep your PA system operating smoothly. Start by checking wireless compatibility; ensure all devices are properly paired and updated to avoid signal interference that can cause feedback squeals. Regularly inspect and clean microphone and speaker connections to prevent dust and corrosion, which can weaken sound quality. Don’t forget battery maintenance—keep batteries charged and replace them when needed to avoid power fluctuations that lead to feedback. If you use wireless mics, monitor signal strength and avoid overlapping frequencies. Properly securing cables and positioning speakers also minimizes feedback risks. Consistent upkeep of these elements guarantees your system functions reliably, providing clear sound without feedback disruptions.
Key Takeaways for Clear, Feedback-Free Sound
Want to guarantee your PA system delivers clear, feedback-free sound every time? Start by minimizing wireless interference, which can disrupt audio quality and cause feedback. Use properly shielded cables and select channels carefully to avoid signal clashes. Acoustical treatment also plays an essential role; reducing reflections and echo in the room helps prevent feedback loops. Position microphones and speakers strategically—keep mics away from speakers and at appropriate distances. Regularly check and update your equipment settings, avoiding over-boosting volume levels. Keep your system well-maintained and be mindful of environmental factors that can introduce noise. By addressing wireless interference and acoustical treatment, you’ll ensure your sound is crisp, clear, and free of feedback screeches, providing a professional experience every time.
Frequently Asked Questions
How Do Different Room Acoustics Influence Feedback Issues?
Room acoustics greatly influence feedback issues by affecting sound reflection and absorption. If your space has hard surfaces, sound reflects more, increasing the risk of feedback. Conversely, adding sound absorption materials like curtains or panels reduces reflections, helping control feedback. You can minimize screeching by adjusting microphone placement and using equalizers, but understanding your room’s reflection patterns and improving sound absorption are key to preventing feedback problems.
What Are the Best Portable PA Systems for Live Events?
When it comes to portable PA systems for live events, you get what you pay for. Look for models with reliable wireless microphones and long battery life, so you’re not chasing cords or running out of juice mid-performance. The Bose S1 Pro or JBL EON ONE Compact are great choices—they’re lightweight, versatile, and deliver solid sound quality. With these, you’ll be ready to hit the ground running without missing a beat.
Can Software Solutions Fully Replace Hardware Feedback Eliminators?
Software advances have improved feedback elimination, but they can’t fully replace hardware feedback eliminators yet. Hardware limitations, like processing speed and real-time response, still pose challenges for software solutions. You might find software helpful for minor adjustments, but for critical live sound situations, hardware feedback eliminators remain more reliable. Relying solely on software could risk feedback issues, so combining both offers the best protection for your sound system.
How Often Should PA System Components Be Inspected or Replaced?
You should inspect your PA system components at least every six months to guarantee equipment longevity and peak performance. Regular inspections help you catch issues early, preventing costly repairs or replacements. Replace components as needed based on wear and tear, usually every 2-5 years, depending on usage. Consistent inspection frequency keeps your system reliable, reduces feedback problems, and extends the lifespan of your equipment, saving you money in the long run.
What Safety Precautions Should Be Taken When Adjusting Sound Equipment?
When adjusting sound equipment, you should prioritize safety by ensuring proper microphone placement to avoid feedback and discomfort. Always check power safety by unplugging equipment before making adjustments, and avoid overloading circuits. Use insulated tools, keep cables organized to prevent tripping, and be cautious of hot surfaces. Wearing appropriate ear and eye protection is also wise. These precautions help you stay safe while optimizing your PA system’s performance.
Conclusion
Think of your PA system as a delicate dance floor where every move matters. When you understand feedback’s rhythm, you can keep the music flowing smoothly without screeches or squeals. With proper placement, sound checks, and maintenance, you control the dance, preventing chaos. Remember, a little tune-up now keeps the noise at bay, letting your sound shine bright like a spotlight—clear, confident, and feedback-free.