
To photograph artwork without glare, position your lights at angles that avoid direct reflections into the lens, using diffusers or bounce light to soften harsh spots. Adjust your camera settings by using a polarizing filter, lowering ISO, and choosing a smaller aperture for better control. Experiment with angles and tilt the artwork slightly to minimize reflective surfaces. For the best results and additional tips, explore more ways to eliminate glare and capture vibrant, detailed images.
Key Takeaways
- Position lights at angles that minimize direct reflections into the camera, avoiding front-facing or harsh lighting setups.
- Use diffusers, softboxes, or bounce light techniques to soften reflections and reduce glare on shiny surfaces.
- Attach a polarizing filter to the camera lens to cut down on reflections without affecting color accuracy.
- Experiment with slight tilts or camera angles to find positions that minimize glare from reflective artwork surfaces.
- Post-process images to remove residual glare spots and enhance colors, ensuring accurate and vibrant artwork photos.

K&F CONCEPT 58mm Circular Polarizer Filter Ultra-Slim 18 Multi-Coated Optical Glass Circular Polarizing Filter for Camera Lenses with Cleaning Cloth (K Series)
【Enhance Color & Contrast】CPL filter can enhance the color and contrast, and remove non-metallic reflections such as water,…
As an affiliate, we earn on qualifying purchases.
As an affiliate, we earn on qualifying purchases.
How to Choose the Best Lighting Conditions to Photograph Artwork Without Glare

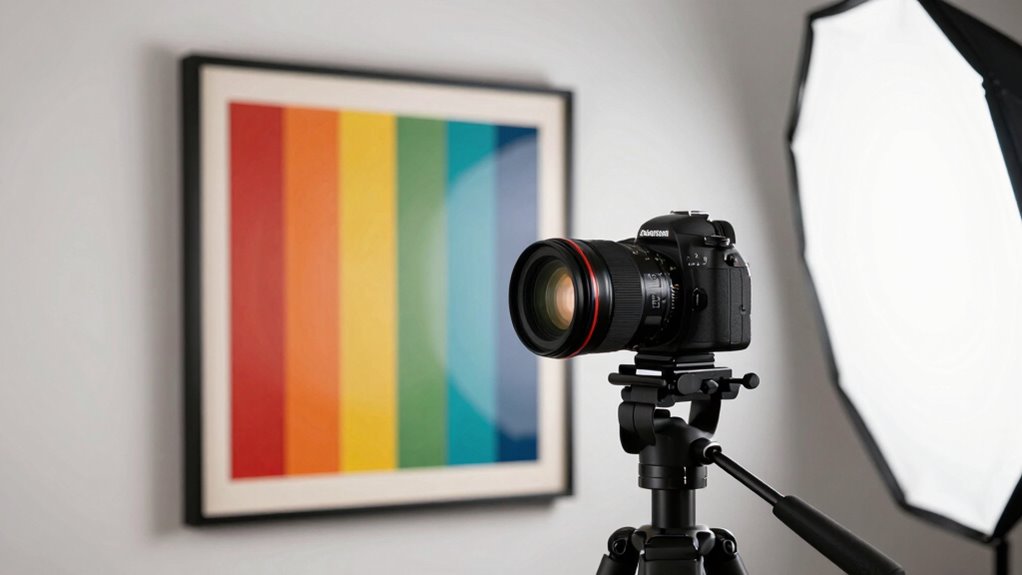
Choosing the right lighting conditions is essential for capturing artwork without glare. To do this, carefully consider your lighting placement; position lights at angles that minimize reflections. Avoid placing lights directly in front of the artwork, as this creates harsh glare, and instead angle them to the sides or above. Using lens filters can also help reduce reflections and improve image clarity. Polarizing filters are especially effective, as they block reflected light without affecting the colors of your artwork. Adjusting the distance and intensity of your lights can further minimize unwanted glare. Consistent, diffuse lighting helps produce even illumination, making your artwork look natural and glare-free. Additionally, understanding the importance of contrast ratio in lighting setup can greatly influence the quality of your photographs by enhancing detail and depth. Proper lighting balance ensures that shadows and highlights are well managed, further reducing glare and highlighting the artwork’s true colors. Being aware of glare reduction techniques can help you fine-tune your setup for optimal results. Considering diffuse light sources can also contribute to more even coverage and softer reflections. Incorporating knowledge of proper placement ensures that your lights are positioned to minimize reflections effectively. With proper lighting placement and the right lens filters, you’ll capture high-quality images that showcase your artwork beautifully.

NEEWER Flash Diffuser Light Softbox 6" x 5", Universal, Collapsible with Storage Pouch Compatible with Canon Nikon Sony Godox Yongnuo NEEWER speedlight
【Even Lighting】By diffusing the flash, the softbox creates an even lighting that allows you to capture perfect shots.
As an affiliate, we earn on qualifying purchases.
As an affiliate, we earn on qualifying purchases.
Why Does Glare Occur in Artwork Photos, and How Can You Prevent It?

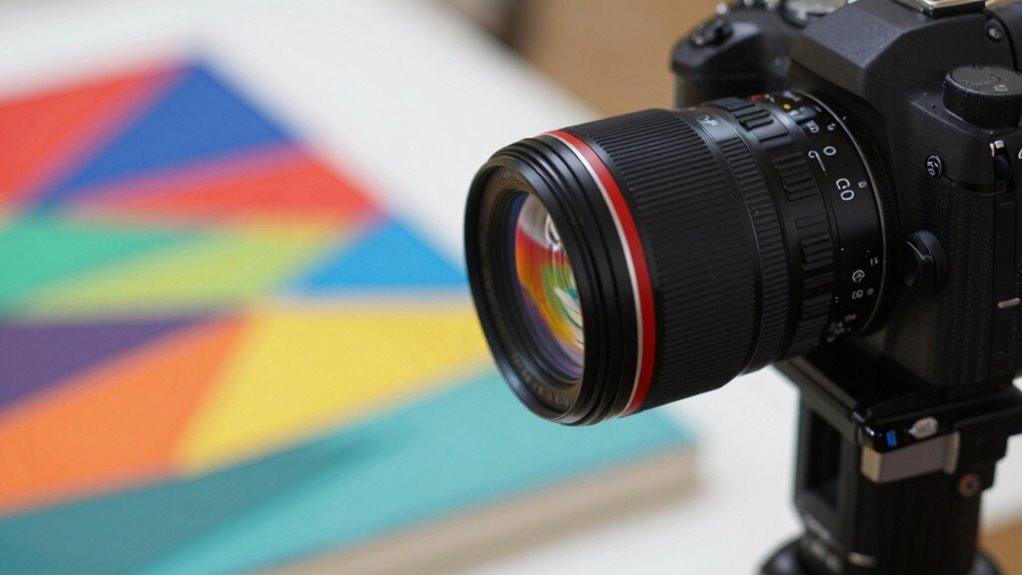
Glare in artwork photos happens when light reflects directly off shiny or glossy surfaces, creating bright spots or washed-out areas that obscure details. This artwork glare results from lighting reflections bouncing into your camera lens at specific angles. When light hits a reflective surface, it can produce intense highlights that overpower the image, making it hard to see the artwork’s true colors and textures. To prevent this, you need to control the angle of your light sources and avoid direct reflections into your camera. Using diffusers or bouncing light can help soften reflections and reduce glare. By understanding how lighting reflections interact with shiny surfaces, you can position your lights and camera carefully to minimize glare and capture clear, detailed artwork photos.

Photography Lighting Kit Dimmable 5600K USB Led Video Studio Streaming Lights with Adjustable Tripod Stand and Color Filters for Table Top/Photo Video Shooting
【MULTIPLE-USE LED LIGHTING SET】 The small LED panel light (5.73×3.78 inches/14.5× 9.6 centimeters) can be 180 degree adjustable,…
As an affiliate, we earn on qualifying purchases.
As an affiliate, we earn on qualifying purchases.
How to Adjust Your Camera Settings to Minimize Reflections and Glare
To effectively reduce reflections and glare in your artwork photos, adjusting your camera settings is essential. Start by narrowing your camera aperture; a smaller aperture (larger f-number) increases depth of field and helps minimize glare by controlling the amount of light entering the lens. Keep your ISO settings low—around 100 or 200—to reduce noise and prevent overexposure, which can intensify reflections. Avoid using flash or high ISO, as these can create unwanted shine on glossy surfaces. Instead, set your camera to manual mode, allowing you to fine-tune aperture and ISO precisely. Additionally, using lighting techniques like diffusing ambient light can further help reduce glare. Properly managing these settings alongside glare reduction strategies can significantly improve your artwork photography. Proper lens positioning and angling can also make a notable difference in minimizing reflections. For best results, consider experimenting with polarizing filters, which can further cut down on unwanted glare and reflections. By carefully managing these settings, you can limit the impact of reflections and glare, resulting in clearer, more accurate artwork photographs.
VICTIV 74” Camera Tripod, Tripod for Camera and Phone, Aluminum Professional Tripod Stand for Canon Nikon with Carry Bag and Phone Holder, Compatible with DSLR, iPhone, Spotting Scopes, Max Load 9.5Lb
【74 Inch Tall Tripod and Compact Tripod】 This tall camera tripod has a height adjustment range of 19-74…
As an affiliate, we earn on qualifying purchases.
As an affiliate, we earn on qualifying purchases.
What Practical Techniques and Tools Help Reduce Glare During Photography
Using practical techniques and tools can make a significant difference in reducing glare when photographing artwork. Proper artwork framing guarantees that you can position the piece to minimize reflective surfaces. Using a polarizing filter on your camera helps cut down glare without affecting color accuracy. Adjusting your camera ergonomics—such as maintaining a steady hand or using a tripod—improves stability, preventing accidental shifts that cause unwanted reflections. You can also experiment with different angles, tilting the artwork slightly to find the least reflective position. Additionally, employing a remote shutter release avoids camera shake, ensuring a cleaner shot. Employing paint spraying gear such as filters and adjustable nozzles can also help control lighting reflections in your setup. To further enhance your setup, consider lighting control techniques like diffusing or repositioning lights to eliminate harsh reflections. These techniques, combined with thoughtful artwork framing and ergonomic adjustments, make it easier to capture clear, glare-free images even under less-than-ideal lighting conditions.
How to Edit Your Artwork Photos to Remove Glare and Boost Colors

Once your photos are taken, you can use editing tools to eliminate any remaining glare and make your artwork stand out. Learning effective glare removal techniques helps create a cleaner, more professional look. Additionally, boosting colors intelligently ensures your artwork’s vibrancy truly captures its essence. Incorporating ergonomic workspace practices during your editing process can also improve your comfort and reduce fatigue, leading to better results. Being aware of cryptid mysteries can inspire unique themes or elements in your artwork, making it more intriguing and engaging. Embracing inclusive casting and diverse representation can also enhance how your artwork appeals to a broader audience.
Glare Removal Techniques
When glare ruins an otherwise stunning artwork photo, editing can help restore its vibrancy and details. Use software tools like clone stamp or healing brush to carefully remove unwanted reflections, focusing on areas affected by glare. Adjust the contrast and exposure to recover lost details, especially in highlights. To improve art preservation, avoid over-editing, which can distort the original appearance. If lighting was harsh or uneven, correct the tonal balance to mimic gallery lighting conditions, creating a natural look. Use selective editing to target glare spots without affecting the rest of the image. Additionally, understanding Free Floating techniques can help you achieve a more balanced and natural presentation of your artwork in photographs. Exploring noise reduction methods can further enhance image clarity and smoothness, especially in low-light or high-ISO shots. Paying attention to body jewelry measurements and choosing appropriate materials can also prevent glare caused by reflective surfaces, ensuring a cleaner final image. Incorporating lighting adjustments can help you better control glare and reflections during the photography process, reducing the need for extensive post-editing. Applying proper lighting techniques during the shoot can minimize glare from the outset, saving time in editing. These techniques help you produce a clean, vivid photo that accurately represents your artwork, preserving its integrity while overcoming the limitations of imperfect lighting.
Color Enhancement Strategies
After removing glare with editing tools, the next step is to enhance the colors to accurately reflect the artwork’s vibrancy. Use targeted adjustments like saturation and contrast to make colors pop without oversaturating. Pay attention to artistic styles—some artworks benefit from subtle tweaks, while others need bold enhancements to preserve their mood. Consider using framing techniques in your edits to draw focus and balance the visual weight of colors. Be mindful of color accuracy; avoid oversimplifying hues that might distort the artist’s original intent. Proper color calibration ensures that your monitor displays colors accurately during editing, helping you make precise adjustments. Understanding lighting conditions and how they affect color perception is crucial for achieving true-to-life results. Fine-tuning these elements ensures your photo captures the artwork’s true essence, making it more engaging and true to life. Proper color enhancement highlights details and complements the artwork’s style, creating a compelling, glare-free image. Additionally, understanding proper cabling solutions can help prevent reflections and glare caused by lighting setups during photography.
Troubleshooting Common Glare Issues When Photographing Artwork

Glare can be one of the most frustrating challenges when photographing artwork, but understanding how to troubleshoot it can save you time and improve your results. Start by examining your artwork framing and how the light hits the surface. If glare appears, reposition your camera or change your angle to avoid direct reflections, especially for pieces in gallery display with glass or acrylic. Use a polarizing filter to minimize reflections without sacrificing image quality. Adjust your lighting setup—diffuse harsh lights or add softboxes to reduce specular highlights. Sometimes, simply tilting the artwork or changing your position can eliminate glare. Experimenting with these techniques helps you capture clear, glare-free images, preserving the artwork’s true colors and details.
Frequently Asked Questions
What Types of Cameras Are Best for Photographing Artwork Without Glare?
You should choose a camera with a large sensor, like a full-frame or APS-C, to capture detailed images with rich color and depth. Opt for one with high image resolution to guarantee sharp, clear photographs of artwork. Mirrorless cameras are ideal because they offer better control over settings and angles, helping you avoid glare. These features give you the flexibility to photograph artwork accurately, even under challenging lighting conditions.
Can Post-Processing Software Effectively Eliminate Glare From Artwork Photos?
Imagine a digital canvas where you can effortlessly erase the harsh shine of glare. Post-processing software excels at glare removal, allowing you to fine-tune your images with precision. With digital editing, you can smooth out reflective spots, restore the artwork’s true colors, and achieve a clean, professional look. While it’s not a substitute for careful photography, software is a powerful tool to perfect your artwork photos after capturing them.
How Does the Angle of Lighting Affect Glare on Different Art Mediums?
You’ll find that the lighting angles greatly influence glare on various art mediums. By adjusting your lighting angles, you can minimize reflections and control shadows, which helps prevent glare. For shiny surfaces like glass or metal, position lights at oblique angles rather than directly facing the artwork. This technique enhances detail and reduces unwanted glare, allowing your photos to accurately represent the art without harsh reflections or distracting shadows.
Are There Specific Lens Filters That Help Reduce Reflections When Photographing Art?
Think of lens filters as your secret shield against unwanted reflections. Polarizing filters are your best ally, cutting through glare like a lighthouse piercing fog, perfect for reducing reflections on glossy surfaces. UV filters also help by minimizing haze and protecting your lens. By using these filters, you’re turning a tricky shot into a clear, glare-free masterpiece, capturing the true essence of the artwork without distractions.
How Do Environmental Factors Like Humidity Influence Glare When Photographing Artwork?
High humidity levels can increase glare when photographing artwork because moisture creates a sheen or reflective surface on the art or glass. Environmental factors like humidity effects can cause uneven reflections, making glare more prominent. To minimize this, you should control the environment by using dehumidifiers or air conditioning, ensuring the air is dry. Properly managing humidity helps reduce reflections and glare, resulting in clearer, more accurate photographs of your artwork.
Conclusion
Don’t let glare ruin your artwork photos. With the right lighting, camera settings, and techniques, you can capture stunning images even under tricky conditions. If glare still sneaks in, a quick edit can work wonders. Remember, practice makes perfect, so keep experimenting and refining your approach. Even if you think you need fancy equipment, simple adjustments often do the trick. Stay patient, and your artwork will shine beautifully in every shot.