
Use this guide to select an educational science experiment kit, prepare it, carry out an experiment, and record what happened. It is for parents, teachers, and beginners working with children; an adult should supervise experiments involving chemicals, heat, glass, sharp tools, or small parts. Allow 45-90 minutes for setup and one experiment, depending on the kit.

Prime made for students and young adults
- Fast, free delivery for dorm and study essentials
- Prime Video and Amazon Music included
- Member-only deals
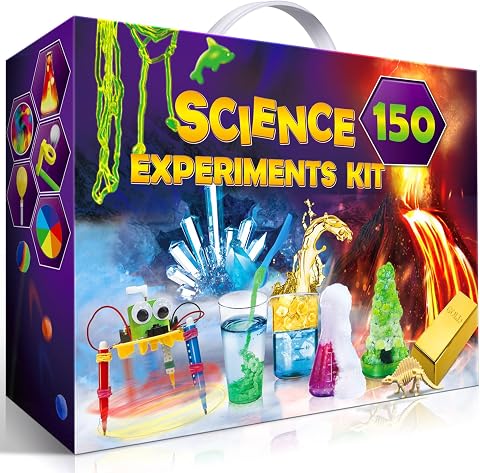
UNGLINGA 150-Experiment Science Kit for Kids
- ✔ Brand: UNGLINGA
- ✔ Experiments: 150 listed
- ✔ Recommended age: 8 years and up
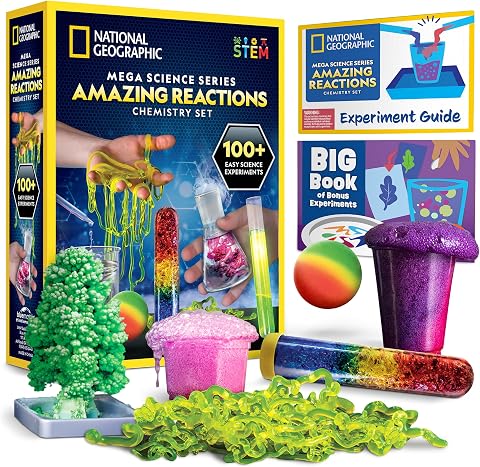
National Geographic Amazing Chemistry Set for Ages 8–12
- ✔ Brand: Blue Marble
- ✔ Sub-brand: National Geographic
- ✔ Age range: 8 years and up

National Geographic Science Magic Kit with 100+ Experiments for Kids 8-12
- ✔ Brand: Blue Marble
- ✔ Sub-brand: National Geographic
- ✔ Age range: 8 years and up
Difficulty: Beginner | Time: 45-90 minutes
What You’ll Need
Tools & Materials:
- An educational science experiment kit with its instruction booklet and listed components
- A clear, washable work surface
- Safety glasses and any protective equipment specified by the kit
- Water, paper towels, and a waste container, if the instructions call for them
- Notebook or printed worksheet and a pencil
Knowledge:
- Ability to follow the kit’s written instructions in order
- Basic understanding that observations should be recorded without changing them to match a prediction
Check the kit’s age range, experiment list, and safety guidance before opening materials. Set aside more time if an experiment requires a growing, cooling, drying, or overnight observation period. Do not substitute household chemicals or combine materials from different experiments.
UNGLINGA 150-Experiment Science Kit for Kids
For families who want one kit to move between scientific subjects, UNGLINGA is the broadest match in this group. Its 150 listed experiments span chemistry, physics, earth science, and more, giving children room to follow different interests instead of staying within a single theme. An illustrated, step-by-step manual can make that variety more approachable for young learners, while the included tools and materials support hands-on work.Compared with the National Geographic Amazing Chemistry Set, UNGLINGA trades a defined chemistry pathway and named lab tools for wider subject coverage. Its activity count is also presented differently: the description does not separate experiments with supplied materials from those requiring household items. We should therefore treat the 150 as a breadth signal, not assume every project is fully self-contained. The need for common household items is the key planning drawback, but for a child whose curiosity jumps between topics, this is the most versatile starting point.
Pros:
- Lists 150 activities across chemistry, physics, earth science, and other topics.
- Includes an illustrated, step-by-step manual for guided exploration.
- Provides experiment tools and materials for hands-on activities.
- Offers broader subject variety than either National Geographic kit in this roundup.
Cons:
- Some activities require common household items, adding preparation.
- The description does not specify which of the 150 experiments have all materials included.
- Broad coverage may be less appealing to a child who wants to concentrate on chemistry or magic demonstrations.
Best for: Children ages 8 and up who want to sample several science subjects and benefit from illustrated, sequential instructions.
Not ideal for: Families seeking a chemistry-only kit with a clearly specified set of supplied experiments, or anyone wanting every activity to rely solely on included materials.
Bottom line: We recommend UNGLINGA as the most versatile choice when broad, guided exploration matters more than a narrow subject focus.
“We recommend UNGLINGA as the most versatile choice when broad, guided exploration matters more than a narrow subject focus.”
National Geographic Amazing Chemistry Set for Ages 8–12
When a child is specifically curious about reactions, crystals, and laboratory-style equipment, the Amazing Chemistry Set gives the clearest subject focus. The kit includes materials for 15 experiments and tools such as test tubes, beakers, and pipettes. Those recognizable instruments can help make chemistry feel like a practical activity rather than an abstract school topic. Crystal growing and chemical reactions give the set a varied but still coherent theme.Its guide adds 85 activities using common household items, expanding the ways a child can explore after the supplied experiments. That makes the headline activity count different from UNGLINGA’s 150: here, 15 are explicitly supplied-material experiments, while the bonus activities depend on items from home. Compared with the Science Magic Kit, this is the more direct choice for chemistry learning, but it gives up the magic-performance hook. The tradeoff is a narrower subject range and some household preparation for the bonus activities; in return, its tools and topic are more clearly aligned.
Pros:
- Materials are included for 15 hands-on chemistry experiments.
- The guide adds 85 bonus activities using common household items.
- Includes test tubes, beakers, and pipettes for a laboratory-style experience.
- Activities include chemical reactions and crystal growing.
Cons:
- The kit is focused on chemistry rather than several science disciplines.
- Most of the listed additional activities rely on common household items.
- The supplied-material experiment count is smaller than the overall activity counts advertised for the other kits.
Best for: Children ages 8 and up who want a chemistry-centered kit with familiar lab tools, reactions, and crystal-growing activities.
Not ideal for: Learners seeking a broad tour of physics and earth science, or families who prefer a large set of activities that are all clearly described as supplied-material experiments.
Bottom line: We’d choose this set over UNGLINGA or the magic kit when chemistry tools and a focused subject path are the priority.
“We’d choose this set over UNGLINGA or the magic kit when chemistry tools and a focused subject path are the priority.”
National Geographic Science Magic Kit with 100+ Experiments for Kids 8-12
The Science Magic Kit is aimed at children who are more likely to investigate when an experiment has a reveal. It combines magic tricks with chemistry and hands-on science, and includes materials for 20 magic experiments plus a bonus booklet of 85+ additional activities. That performance element gives it a distinct role alongside the more conventional breadth of UNGLINGA and the focused lab approach of the Amazing Chemistry Set.For a child who enjoys showing a surprising result to family or friends, the format may make scientific ideas easier to approach. Compared with the Amazing Chemistry Set, however, it is less clearly positioned as a chemistry toolkit: its organizing idea is magic, and the description names no specific lab tools. It also gives little detail about material quality, so we cannot judge the feel or durability of the components from the supplied information. The bonus booklet broadens the activity selection, but its relationship to the included materials is not specified as clearly as the chemistry set’s household-item activities. Choose it for the engagement style, rather than assuming its total count means the most complete science curriculum.
Pros:
- Combines magic demonstrations with science and chemistry activities.
- Includes materials for 20 magic experiments.
- Adds a bonus booklet with 85+ further activities.
- Offers a more performance-oriented learning hook than the other two kits.
Cons:
- The description does not provide specific material-quality details.
- The bonus activities’ material requirements are not clearly stated.
- The magic theme may be less suitable for children who prefer straightforward subject-based experiments.
Best for: Children ages 8 and up who enjoy magic tricks, demonstrations, and sharing surprising experiments with others.
Not ideal for: Learners who want broad coverage across science disciplines, a chemistry-focused set of named lab tools, or detailed information about the materials before choosing.
Bottom line: We’d pick the Science Magic Kit when a magic-led format is the strongest way to draw a child into experimenting.
“We’d pick the Science Magic Kit when a magic-led format is the strongest way to draw a child into experimenting.”
As an Amazon Associate we earn from qualifying purchases.
Before You Start
Read the safety information and the instructions for the specific experiment before handling its materials. Follow the age guidance and adult supervision requirements on the packaging. Keep food and drinks away from the work area, wash hands after the activity, and follow the kit’s disposal directions. Stop if a container leaks, a label is missing, or the instructions are unclear; ask the kit’s manufacturer or a qualified adult for guidance.
Step-by-Step Instructions
Step 1: Choose a kit that fits the learner
Compare the kit’s age range, experiment topics, number of activities, and estimated time with the learner’s interests and abilities. Read the materials list and safety notes on the package or product information. Pick a kit that provides clear instructions and activities you can complete with the supervision and space available.
Tip:For a first kit, prefer one with a short, self-contained experiment and a complete list of included materials.
Check: You can name the experiment you plan to try, identify the intended age range, and explain what adult help it needs.
Step 2: Read the experiment instructions
Select one experiment and read its full procedure from start to finish before opening or mixing anything. Note the quantities, order of actions, waiting times, protective equipment, and disposal directions. Mark any step that requires an adult or a household item not included in the kit.
Tip:Do not rely on a picture on the box as a substitute for the experiment’s written safety and setup instructions.
Check: You know what to do at each stage and have identified any steps that depend on timing or adult assistance.
Step 3: Check the kit contents
Lay out the kit contents and compare them with the parts list. Keep containers labeled and closed until needed. Gather only the additional items named in the instructions, such as water or a spoon. If a required part is missing or damaged, pause and contact the seller or manufacturer rather than improvising a replacement.
Tip:Keep small parts away from young children and pets, especially when the experiment is not in progress.
Check: All listed components are present, identifiable, and in usable condition, and the extra materials are ready.
Step 4: Prepare the workspace
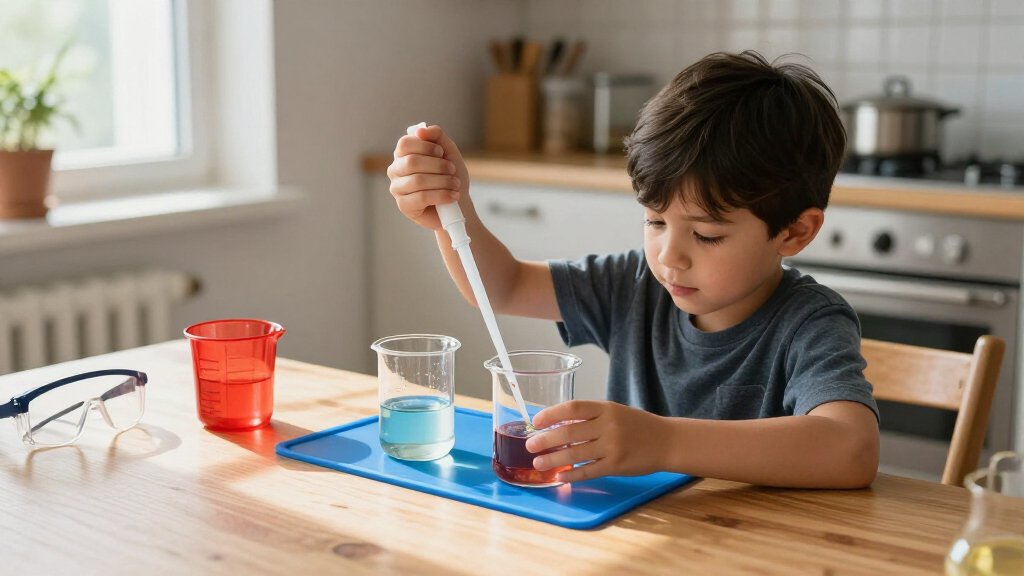
Choose a stable, well-lit surface with room to arrange materials in the order you will use them. Move food, drinks, and unrelated objects away. Put on the protective equipment specified by the instructions, and place paper towels and a waste container nearby if appropriate. Keep the instruction booklet open and within reach.
Tip:Use a washable surface or a tray when the kit warns about spills, stains, or residue.
Check: The work area is clear, the required protective equipment is on hand, and you can reach the instructions without moving experimental materials.
Step 5: Make a prediction and record a starting point
Write the experiment’s question in a notebook or worksheet. Record what you think will happen and why, then note the starting conditions the instructions ask you to observe, such as color, temperature, or the amount of material. Keep the prediction separate from your observations.
Tip:A prediction can be wrong and still be useful. Record what you expect before seeing the result.
Check: Your notes contain a question, a prediction, and any requested starting observations.
Step 6: Carry out the experiment in order
Follow one instruction at a time, using the quantities and sequence provided. Measure with the kit’s supplied tools when directed. Have an adult handle any restricted step, and do not taste, smell closely, touch, heat, or dispose of materials unless the instructions explicitly direct you to do so safely. If the procedure calls for waiting, leave the setup undisturbed for the stated time.
Tip:Do not add extra ingredients or repeat a step unless the instructions say to. A change in quantity can change the result.
Check: You have completed the procedure as written, and the setup matches the instructions for the observation stage.
Step 7: Observe and record the result
Look for the changes named in the instructions and record what you see, including the time and any measurements requested. Use specific descriptions such as “the liquid turned blue” or “the paper felt damp” instead of “it worked.” Compare the observation with your prediction after recording the result.
Tip:If the experiment has several observation times, write each one down rather than relying on memory.
Check: Your notes describe the actual result and include the requested measurements or observation times.
Step 8: Clean up and store materials
Follow the kit’s disposal instructions for every material; do not pour substances down a drain or put them in household waste unless the instructions allow it. Close and store reusable components as directed. Wipe the work area, remove protective equipment safely, and wash hands with soap and water.
Tip:Keep the booklet and any labels with the kit so the safety and disposal information remains available for the next activity.
Check: Materials have been disposed of or stored as directed, the workspace is clean, and hands have been washed.
Common Mistakes to Avoid
- Opening or combining materials before reading the full procedure. — Read the experiment and safety directions first, then lay out the materials in the order they will be used.
- Changing quantities, skipping a wait, or adding an unlisted ingredient. — Follow the stated amounts and timing. Record unexpected results instead of altering the procedure mid-experiment.
- Choosing a kit based only on its age label or advertised activity. — Check the actual supervision, equipment, space, and cleanup requirements before choosing.
- Treating a result that differs from the picture as a failed experiment. — Compare observations with the written procedure and note differences; small changes in conditions can affect what happens.
Troubleshooting
Problem: A required component is missing or damaged.
Solution: Stop before starting that experiment. Check the parts list and packaging once more, then contact the seller or manufacturer for the correct replacement. Do not substitute an unapproved material.
Problem: The expected change does not appear.
Solution: Check that you used the correct quantity, sequence, and waiting time, then record what happened. Review the booklet for room temperature or other stated conditions. Do not repeat or intensify the experiment unless the instructions permit it.
Problem: A spill or unexpected reaction occurs.
Solution: Stop handling the materials and alert the supervising adult. Follow the kit’s spill and exposure directions, keep others away from the area, and use the specified protective equipment. Seek medical or emergency help if the label or instructions call for it.
Problem: The child cannot complete a step independently.
Solution: Pause at that step and have an adult demonstrate or perform the part identified for supervision. Keep the child involved in safe tasks such as reading instructions, timing, and recording observations.
What Success Looks Like
The experiment is complete when you followed the kit’s directions and safety guidance, recorded the observation and any requested measurements, and cleaned up or stored materials as instructed. A result can differ from the prediction; success means the procedure was carried out carefully and the outcome was recorded honestly.
Next Steps
Use the notes to discuss why the result may have occurred and what evidence supports that explanation. If the booklet offers another activity, check its materials and safety requirements before beginning. Store the kit with its instructions, labels, and reusable parts together, and repeat an experiment only when the manufacturer’s directions allow it.
Frequently Asked Questions
Can I use a science kit without an adult?
Follow the kit’s age rating and supervision directions. An adult should supervise children and handle any step the instructions identify as requiring adult help, especially when heat, chemicals, glass, sharp tools, or small parts are involved.
What should I do if the experiment looks different from the box?
Record what you observed, then check the procedure, quantities, timing, and any stated conditions. Packaging images may show an example result; they do not replace the written instructions or make a different observation a failure.
Can I replace a missing ingredient with something from home?
Only use substitutions approved in the kit instructions or by the manufacturer. A different material may change the experiment or create a safety risk. Pause and request the correct part if a listed component is missing.
How should I dispose of the experiment materials?
Use the disposal directions supplied with the kit. If they are missing or unclear, keep materials contained and ask the manufacturer or a qualified adult for guidance before putting them in a sink or bin.
Evergreen bestsellers Picks
bestsellers
As an affiliate, we earn on qualifying purchases.