
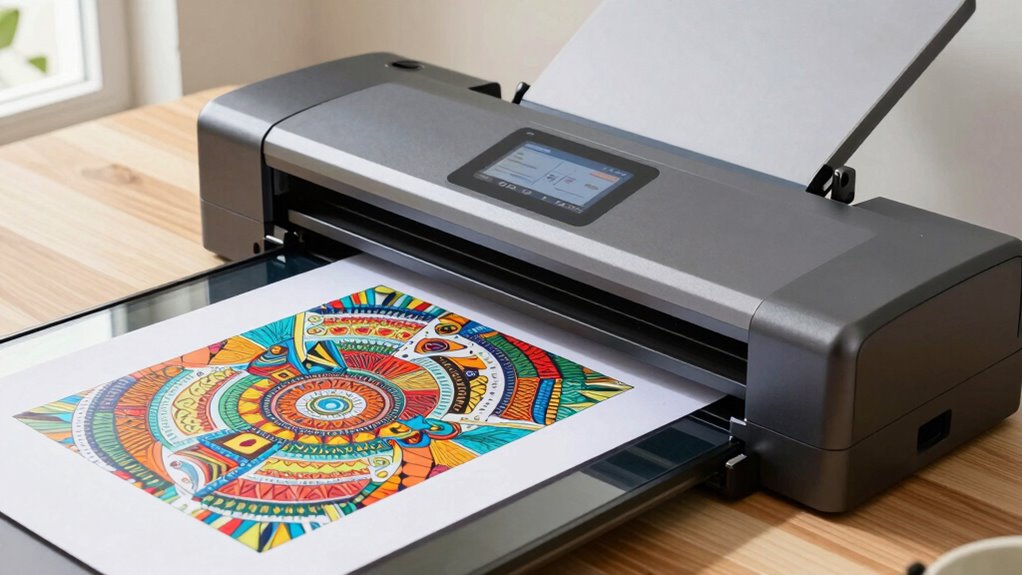
When scanning artwork at home, set your scanner to at least 300 DPI to capture fine lines and textures accurately. For more detailed work like watercolors or sketches, 600 DPI or higher guarantees better preservation. Avoid using overly high resolutions that create unnecessarily large files. To get the best results, regularly calibrate your scanner and adjust color settings. Keep exploring to discover tips that will help you digitize your artwork confidently and beautifully.
Key Takeaways
- Use at least 300 DPI for general artwork; 600 DPI or higher for fine details and professional quality.
- Calibrate your scanner regularly to ensure accurate color and detail reproduction.
- Adjust resolution based on artwork complexity: higher DPI for intricate or restoration work.
- Pay attention to paper texture, ensuring subtle surface details are captured without distraction.
- Balance resolution with file size needs to prevent unnecessary storage use while preserving crucial details.

Epson Perfection V19 II Color Photo and Document Flatbed Scanner with 4800 dpi Optical Resolution USB Power, High-Rise, Removable Lid
Amazing image clarity and detail — 4800 dpi optical resolution (1), ideal for photo enlargements
As an affiliate, we earn on qualifying purchases.
As an affiliate, we earn on qualifying purchases.
Understanding DPI and How It Affects Your Artwork Scans
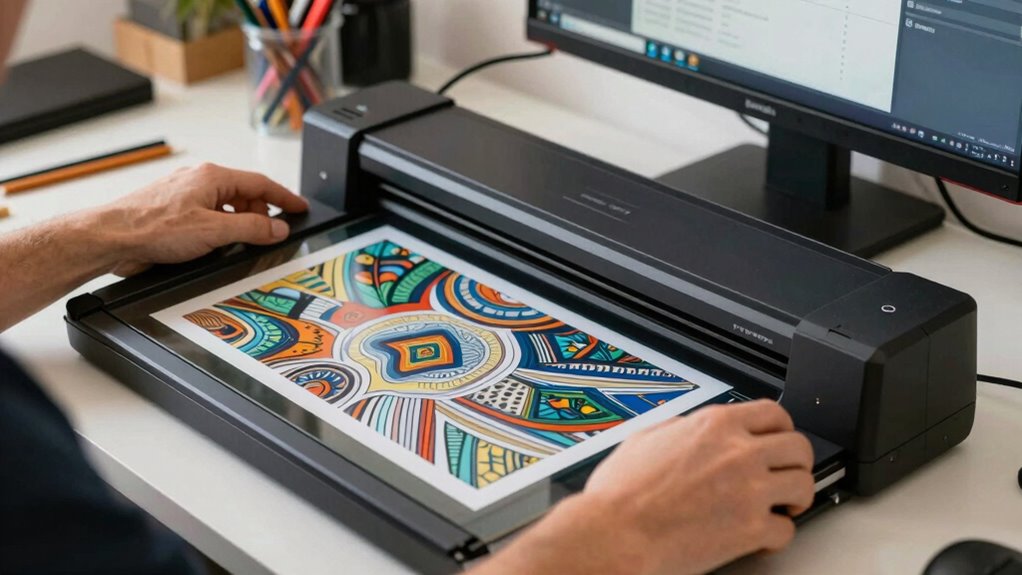
Understanding DPI is essential because it directly impacts the quality of your scanned artwork. When you choose the right DPI, you’re ensuring your scans capture the true details and colors of your original piece. Higher DPI settings, like 300 or more, preserve fine lines and subtle textures, making your digital version look closer to the physical artwork. To achieve this, regularly perform scanner maintenance; clean the glass and check calibration to avoid streaks or color inaccuracies. Proper scanner maintenance not only keeps your device in optimal condition but also extends its lifespan and ensures consistent results. Calibration is vital, too, because it helps your scanner reproduce colors accurately, maintaining the integrity of your art. Additionally, resolution settings play a key role in balancing scan quality with file size and processing time. Being aware of file management techniques can help you organize and optimize your digital collections effectively. Understanding the importance of resolution and how it interacts with other settings ensures you get the best possible scan quality. By understanding how DPI affects your scans and keeping your equipment well-maintained and calibrated, you’ll produce high-quality digital reproductions that truly reflect your original artwork.

Plustek Calibration Control Sheet – for ePhoto Z300 Scanner only
For ePhoto Z300 calibration use only
As an affiliate, we earn on qualifying purchases.
As an affiliate, we earn on qualifying purchases.
Why Resolution Is Critical for Preserving Artwork Details
When you scan artwork at a higher resolution, you capture more fine details, making your digital copy look just as sharp as the original. This guarantees the intricate lines and textures are preserved accurately. Choosing the right resolution is essential for maintaining ideal image quality and showcasing your artwork’s true beauty. Additionally, understanding emerging trends in digital publishing, such as high-efficiency scanning technology, can help you stay updated on best practices for digital preservation. Incorporating digital preservation techniques can further ensure your artwork remains protected and accessible over time, especially when considering whole-home system efficiency principles that optimize the longevity and reliability of your digital archives. Staying informed about scanning resolution standards can also help you achieve consistent and professional results in your digital reproductions.
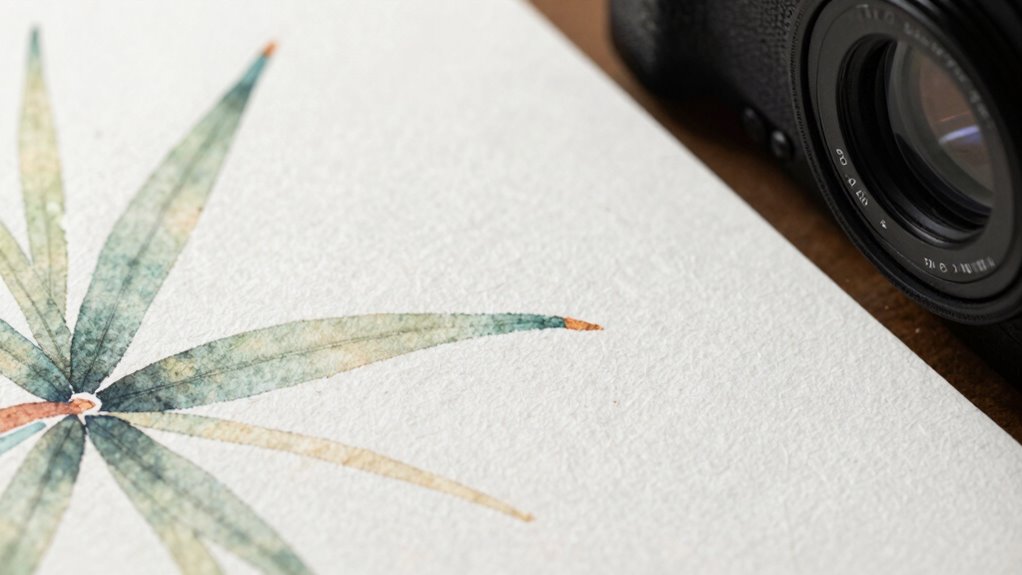
Fine Detail Preservation
High resolution is essential for capturing the intricate details of artwork accurately. When you scan, every nuance matters—like the subtle brush strokes, fine lines, and delicate textures. To preserve these, focus on three key aspects: 1. Adjust your scanner’s resolution to at least 300 DPI, ensuring sharp detail. 2. Use color calibration to match the artwork’s original hues, preventing color shifts that obscure fine features. 3. Pay attention to paper texture, as high resolution captures surface details like canvas weave or watercolor paper grain. These steps help retain the artwork’s depth and authenticity. Remember, a high-quality scan isn’t just about resolution; it’s about faithfully reproducing the artist’s intent through precise detail, accurate colors, and surface nuances. Additionally, understanding resolution’s impact on image quality can guide you in choosing the best settings for your artwork. Properly setting your scanner’s resolution also minimizes digital artifacts, which can distort fine details during the scanning process. Recognizing the relationship between resolution and detail ensures you make informed choices for the most authentic reproductions.
Optimal Image Quality
Capturing the fine details of artwork relies heavily on choosing the right resolution. Higher resolutions ensure sharp, detailed images that accurately reflect the original piece. Proper color calibration is essential to preserve hues and shades, preventing distortions that can diminish artwork quality. Regular scanner maintenance keeps your device running smoothly, avoiding artifacts or blurriness that compromise image clarity. Additionally, understanding how different performance parts influence your vehicle’s overall function can help you optimize your setup for better results. To further enhance image quality, it’s beneficial to be aware of how dust accumulation on scanner optics can affect scan clarity. Keeping your scanner’s optical components clean is crucial for maintaining high-quality scans. Moreover, selecting the appropriate resolution settings tailored to your specific artwork ensures optimal detail preservation. Using tools like resolution guides can help you determine the ideal setting for different projects. Use this table as a guide:
| Resolution | Best Use |
|---|---|
| 300 dpi | General archiving, prints, sharing |
| 600 dpi | Fine detail preservation, professional scans |
| 1200 dpi | Extremely detailed work, restoration scans |
Choosing the right resolution, maintaining your scanner, and calibrating colors will help you achieve ideal image quality and keep artwork details crisp.
Epson Perfection V19 II Color Photo and Document Flatbed Scanner with 4800 dpi Optical Resolution USB Power, High-Rise, Removable Lid
Amazing image clarity and detail — 4800 dpi optical resolution (1), ideal for photo enlargements
As an affiliate, we earn on qualifying purchases.
As an affiliate, we earn on qualifying purchases.
How to Choose the Best Resolution for Watercolors, Sketches, and More

Choosing the right resolution is essential to guaranteeing your digital copies of watercolors, sketches, and other artwork look sharp and detailed. For artwork with subtle color variations, aim for at least 300 dpi to preserve color calibration and avoid banding. Imagine zooming in to see:
Choosing the right resolution ensures your artwork remains sharp, detailed, and true to the original.
- The delicate blending of watercolor washes
- Fine pencil strokes capturing texture
- Vibrant hues that stay true to the original
- Color accuracy can also be influenced by your scanner’s settings and calibration, which are crucial for faithful reproductions. Additionally, understanding scanner resolution settings ensures you capture all nuances of your artwork effectively. Higher resolutions capture more detail but result in larger files, so balance your needs with storage. When scanning, consider paper texture—rough paper reveals more grain, affecting resolution choice. Adjust your scanner settings accordingly to ensure textures are captured clearly without sacrificing color accuracy. Proper scanner calibration is vital for consistent and accurate reproductions, especially when working with a series of artworks. This way, your digital image will faithfully represent both the details and the feel of your artwork.

Slide Viewer Light Box, Ultra-Thin A4 USB Powered Light Scanner for Photo Slide and Film Negative Scanning, Christmas Gift, Tattoo Drawing, Artist Sketching
Ultra-thin and ultra-large: The light board is made of high-quality light guide plate material, ultra-thin and lightweight, only…
As an affiliate, we earn on qualifying purchases.
As an affiliate, we earn on qualifying purchases.
Tips for Setting Your Scanner to Capture Fine Details
To capture fine details in your artwork, start by adjusting your scanner’s resolution settings to guarantee sharpness without creating oversized files. Be mindful of using the correct color depth to preserve subtle hues and textures in your pieces. Properly setting these options helps produce high-quality scans that truly reflect your artwork’s intricacies.
Adjusting Resolution Settings
Adjusting the resolution settings on your scanner is essential for capturing fine artwork details accurately. When you set the right resolution, you ensure that every intricate line and subtle shading is preserved. Start by selecting a resolution between 300 and 600 DPI, depending on your artwork’s complexity. Imagine:
- Fine pencil strokes showing crisp and clear, like they’re right on the page.
- Colors appearing vibrant and true-to-life, thanks to proper color calibration.
- The paper texture subtly visible, adding depth without distracting from the image.
Adjustments should consider the paper’s surface—smooth or textured—and how it affects detail capture. Proper resolution guarantees your scan maintains the original’s clarity and nuance, making your digital version truly stand out.
Using Color Depth Properly
When setting your scanner for artwork, paying attention to color depth is essential for capturing fine details accurately. A higher color depth, such as 24-bit or 48-bit, allows you to record more color information, resulting in richer, more nuanced images. Proper color calibration ensures that your scanner reproduces colors faithfully, which is crucial for preserving artwork details. Regular scanner maintenance, like cleaning the glass and checking connections, prevents color artifacts and ensures consistent performance. Avoid setting the color depth too low, as it can cause loss of subtle details and dull colors. By maintaining your scanner and selecting the appropriate color depth, you’ll produce scans that truly reflect the intricacies of your artwork, making digital reproductions vibrant and true to the original.
Balancing File Size and Image Quality for Easy Storage and Sharing

Balancing file size and image quality is essential for easy storage and sharing of your scanned artwork. To achieve this, consider these steps:
- Use appropriate resolution settings that preserve detail without creating massive files, especially when applying color calibration for accurate color representation.
- Choose suitable storage formats like JPEG for smaller files or TIFF for high-quality archives, depending on your needs.
- Compress images carefully to maintain visual fidelity while reducing size, ensuring your artwork remains sharp and true to the original.
Common Mistakes to Avoid When Digitizing Artwork

While managing file size and image quality is important, many people overlook common mistakes that can compromise the accuracy and overall quality of their digital artwork. One mistake is neglecting proper color calibration, which can lead to colors that don’t match the original piece. Always calibrate your monitor and scanner regularly to ensure accurate color reproduction. Another common error is skipping scanner maintenance; dust, smudges, or dirt on the scanner glass can create unwanted spots or distortions in your images. Additionally, using the wrong resolution or settings can result in loss of detail or unnecessarily large files. By maintaining your scanner and paying attention to color calibration, you avoid these pitfalls and produce digital copies that truly reflect your artwork’s original quality.
Final Checklist for Perfect Digital Artwork

Before finalizing your digital artwork, it’s vital to go through a thorough checklist to guarantee the highest quality. First, verify your scanner is properly calibrated for accurate color and detail, using print calibration tools if needed. Next, examine your paper texture; choose a surface that complements the artwork’s detail and minimizes glare or distortion. Finally, review the digital file: check resolution settings to preserve fine lines and textures, and verify color accuracy on-screen. With these steps, you’ll capture true-to-life details and vibrant colors. Visualize crisp lines on textured paper, precise color matching, and sharp details in your digital file. This checklist helps you avoid surprises when printing or sharing your artwork, delivering a professional-quality result every time.
Frequently Asked Questions
How Does Scanner Type Influence Resolution Choices for Artwork?
Your choice of scanner type directly impacts resolution choices for artwork because different scanner technology offers varying levels of detail and clarity. Flatbed scanners typically meet higher resolution standards, making them ideal for detailed artwork, while handheld or document scanners might have lower resolution standards, suitable for simpler scans. Selecting the right scanner guarantees you capture fine details, so consider these differences to achieve the best quality for your artwork.
Can Adjusting Contrast or Brightness Affect Scan Detail Quality?
Think of adjusting contrast or brightness like tuning a musical instrument—you can enhance or distort the harmony. When you tweak these settings, it can either bring out fine details or cause loss of subtle nuances. To maintain clarity, do proper color calibration and scan calibration first. This guarantees your adjustments enhance your artwork without sacrificing essential detail, letting your scan sing with true vibrancy and precision.
What Software Tools Assist in Enhancing Scanned Artwork Resolution?
You can use software tools like Adobe Photoshop, GIMP, or Affinity Photo to enhance your scanned artwork’s resolution. These programs allow for digital enhancement, sharpening details, and resolution optimization, ensuring your artwork retains its clarity. By adjusting settings such as sharpness, noise reduction, and interpolation methods, you improve the overall quality. Regularly experimenting with these tools helps you achieve the best possible resolution and detail in your scans.
How Do Color Profiles Impact Digital Reproduction Accuracy?
Color profiles are essential for digital reproduction accuracy because they guarantee consistent color calibration across devices. When you use proper color profiles, your scanned artwork maintains true-to-life hues, regardless of where it’s viewed or printed. Choosing the right file format, like TIFF or PNG, also preserves color information. This combination helps you achieve a faithful, high-quality digital copy that accurately reflects your original artwork’s colors.
Is It Better to Scan at a Higher Resolution and Reduce Afterward?
Imagine capturing every brushstroke and vibrant hue of your artwork—scanning at a higher resolution lets you preserve these details, even if it takes more time. Yes, it’s better to scan at a higher resolution and reduce afterward because it minimizes resolution trade-offs, keeping details sharp. While scanning speed slows down, you gain flexibility with image quality, ensuring your digital copy truly reflects your original masterpiece.
Conclusion
To get the best digital copies of your artwork, remember that choosing the right resolution is key—did you know that scanning at 300 DPI captures enough detail for most prints, while 600 DPI is ideal for preserving fine lines? By balancing resolution with file size, you’ll make certain your artwork stays crisp and easy to share. Keep these tips in mind, and you’ll create stunning digital versions that truly do justice to your original pieces.